
Cash Sales let you raise an invoice for a walk-in or one-off customer without searching for an account every time. A single, pre-configured "cash sale" customer is used for these transactions, so a new invoice can be started from the Invoice Register with one click — already dated, referenced and assigned to your branch, ready for you to add items.
This is ideal for counter sales, point-of-sale style transactions, or any ad-hoc sale where you don't want to create or maintain a separate customer record.
One-Time Setup (Administrator)
Before the Cash Sale button appears, an administrator needs to nominate the customer account that cash sales are billed to. This is done once.
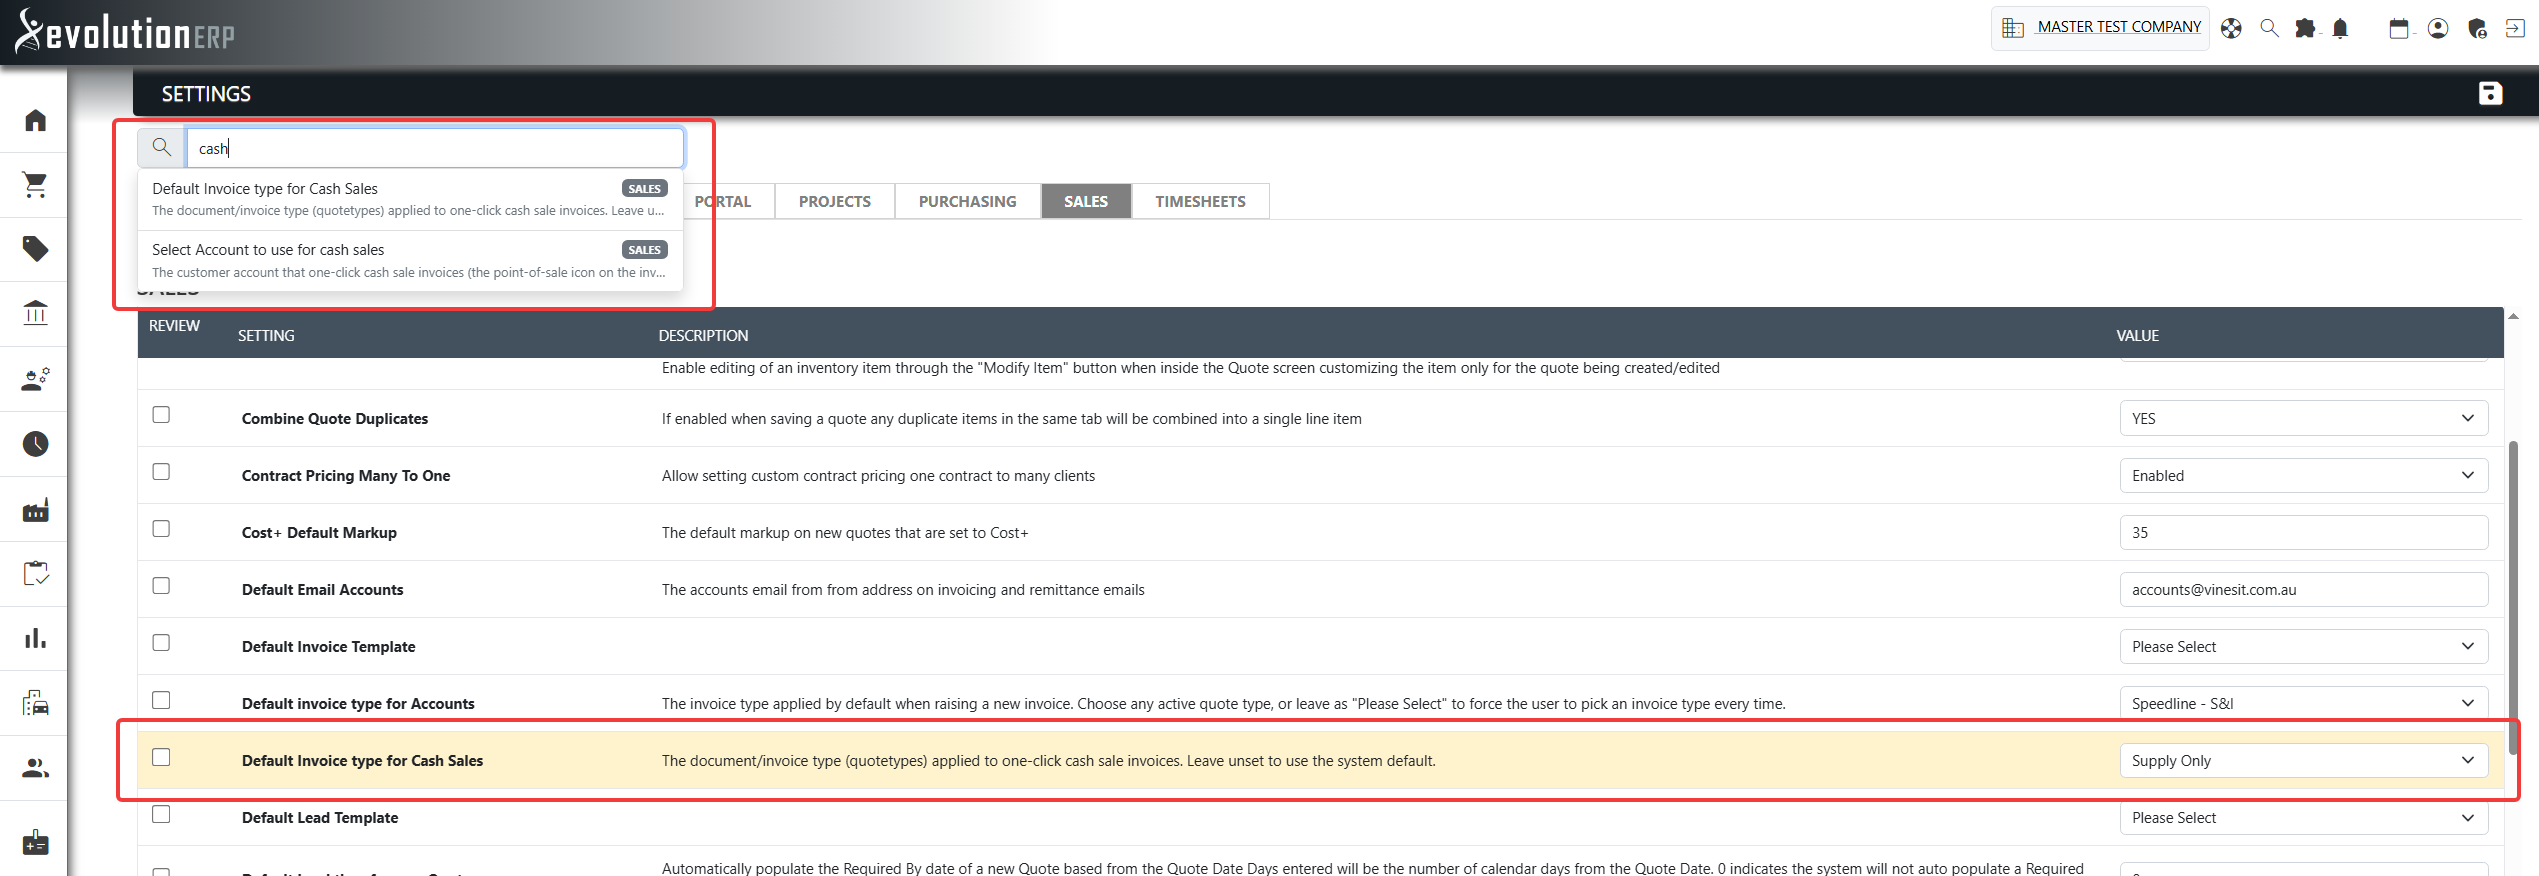
- Go to Settings and open the Sales tab.
- Find “Select Account to use for cash sales”. Start typing in the search box to find the customer you want to use as your cash sale account, then select it. The first contacts are shown by default so you can also just pick from the list.
- (Optional) Find “Default Invoice type for Cash Sales” and choose the document/invoice type that cash sale invoices should use. Leave this unset to use the system default.
- Click Save.
Where to Find It
Sales → Invoice Register
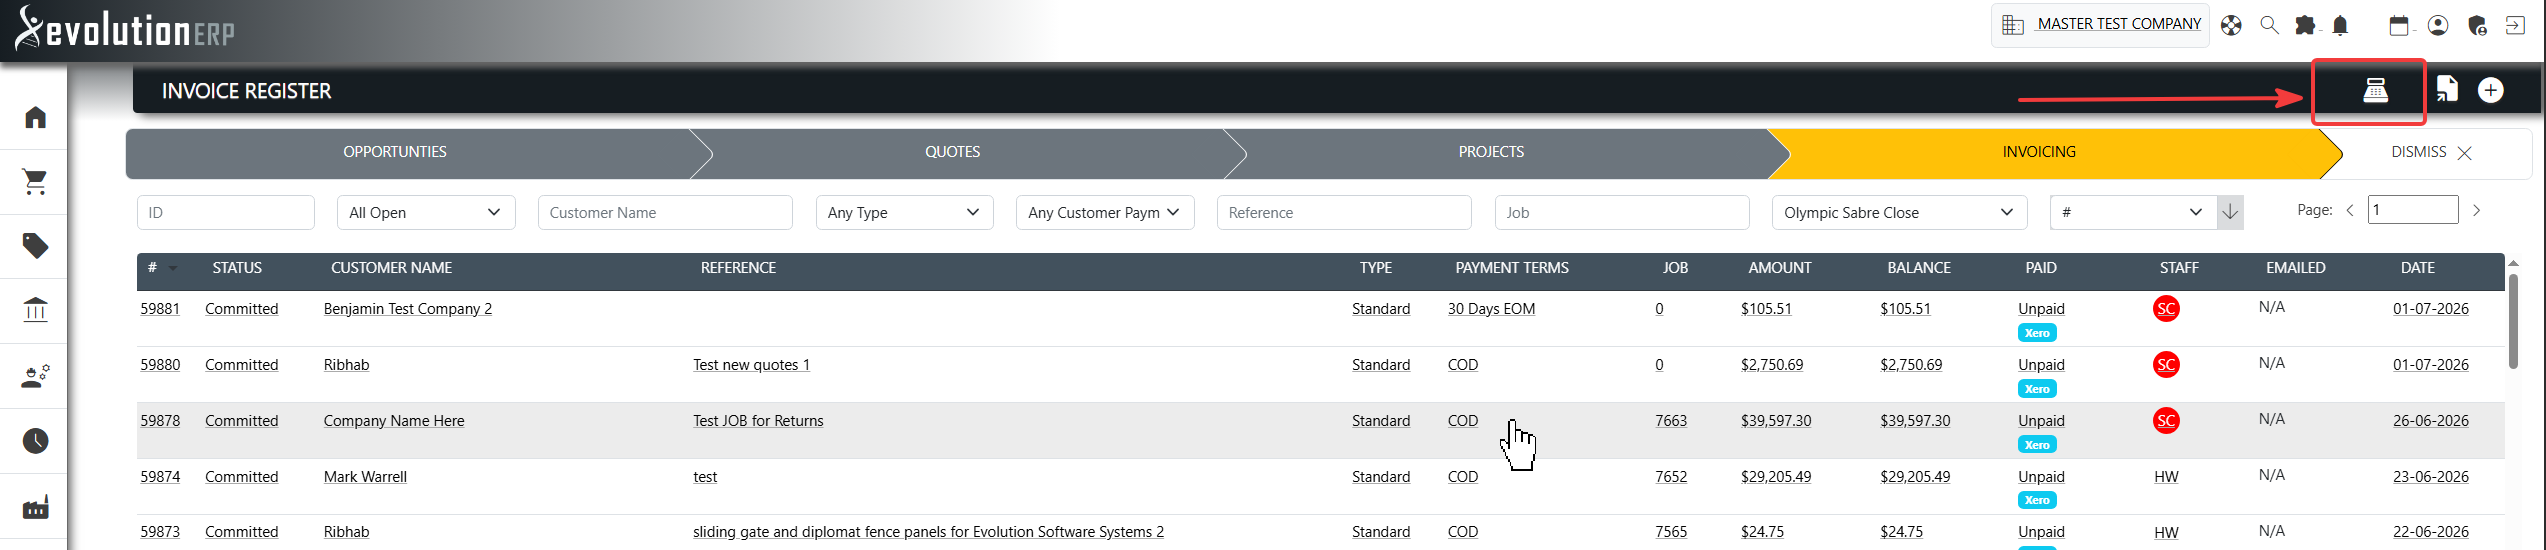
Once the cash sale account has been configured, a point of sale icon (point_of_sale) appears in the top-right of the Invoice Register, next to the standard “new invoice” button.
If you don't see the icon, the cash sale account has not been set up yet — see One-Time Setup above.
Creating a Cash Sale
- Go to Sales → Invoice Register.
- Click the cash sale icon (point_of_sale) in the top-right.
- A new invoice is created and opened automatically against your cash sale account. Add your items and complete the sale as you would any other invoice.
The new invoice opens pre-filled with:
- Customer – your configured cash sale account
- Reference – “Cash Sale”
- Date – today’s date
- Invoice type – the default type you set (if configured)
- Branch – your branch (see below)
How the Branch Is Set
The cash sale invoice is assigned to your branch automatically.
If your user is set to “All” branches rather than a single branch, the system uses the branch of the last invoice you created, so the sale lands in the branch you were most recently working in. You can always change the branch on the invoice before completing it.
Completing the Sale
From here the invoice behaves exactly like a normal invoice:
- Add inventory items, labour or free-text lines.
- Apply any discounts as needed.
- Take payment and allocate it against the invoice.
- Commit the invoice when you’re ready to finalise it.
Frequently Asked Questions
Can I change the customer after starting a cash sale?
Yes. The cash sale account is just a starting point. You can change the customer on the invoice if a particular sale needs to be billed to a named account.
The cash sale icon isn’t showing — why?
The icon only appears once an administrator has selected a cash sale account in Settings → Sales. If it’s missing, complete the one-time setup.
Can I report on cash sales?
Yes. Because every cash sale is billed to the same account and carries the “Cash Sale” reference, you can filter the Invoice Register (or sales reports) by that customer or reference to review them.