
Every business captures something Evolution does not ship a box for — a fencing type, a height, a site access note, a colour, a council reference. Custom Fields is where you add those boxes yourself. You choose the name, the kind of answer, which screen it appears on, and whether staff are allowed to save the record without filling it in.
Where to find it
Go to Settings → Custom Fields. The screen lists every active custom field on your system, grouped by the screen it appears on.
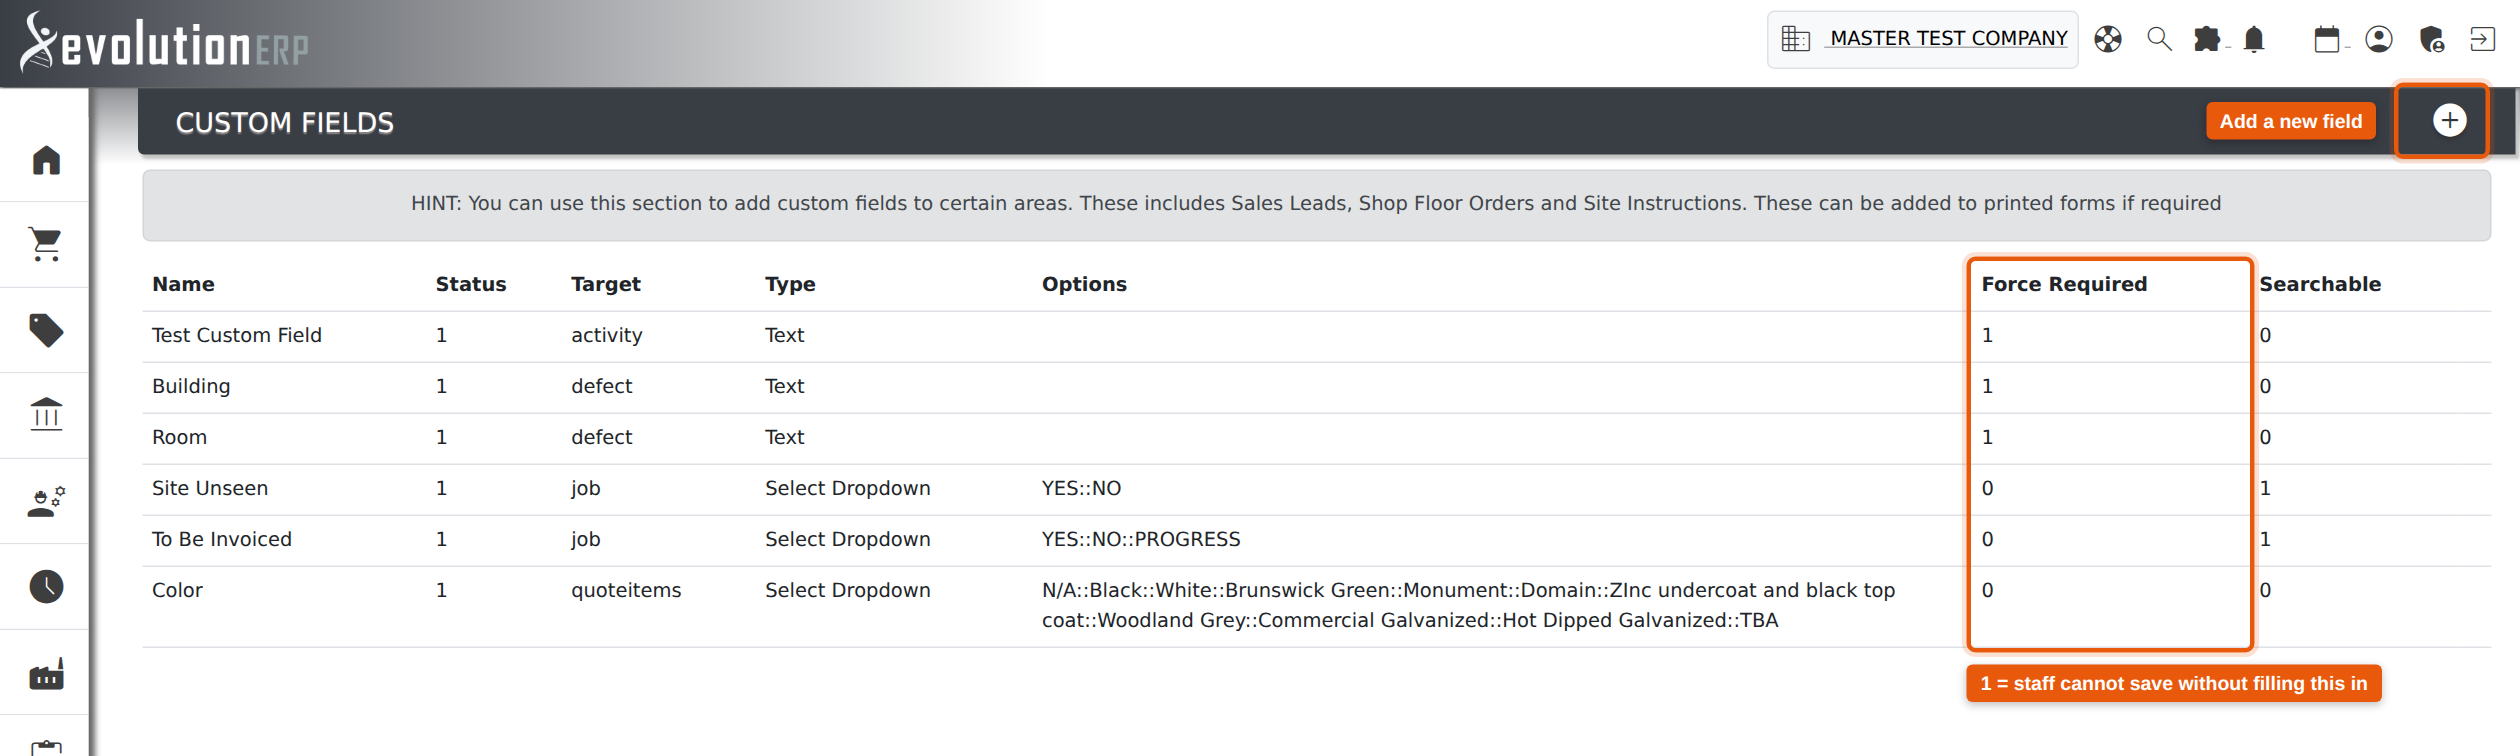
The list has one row per field:
| Column | What it shows |
|---|---|
| Name | The label your staff see above the box. |
| Status | 1 = active. Only active fields are listed here. |
| Target | The screen the field appears on — see Where each field appears. |
| Type | The kind of answer: text, number, date or a list to pick from. |
| Options | For list fields, the available choices, separated by ::. |
| Force Required | 1 = staff cannot save the record until this is filled in. 0 = optional. |
| Searchable | 1 = the field is offered in Advanced Search on the Project Register. |
Status, Force Required and Searchable are shown as 1 and 0
rather than Yes and No. Read 1 as Yes.
Adding a field
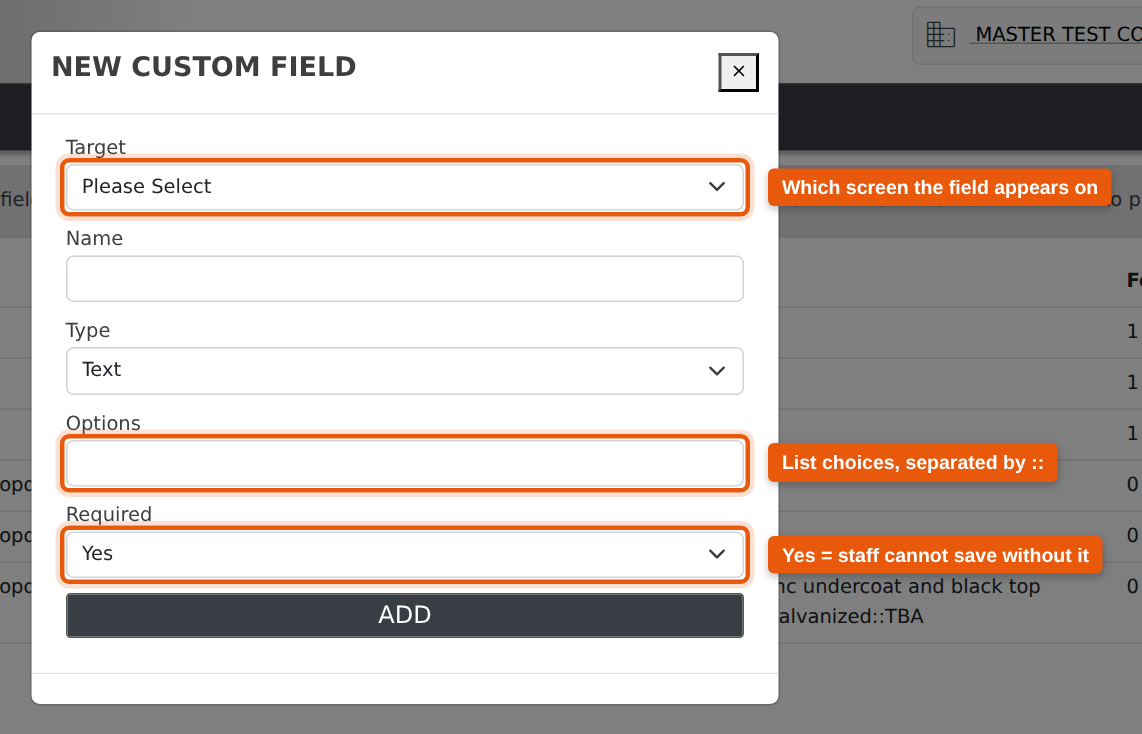
Click the add_circle_outline button at the top right of the screen. You are asked for five things:
| Field | What to enter |
|---|---|
| Target | Which screen the field should appear on. See Where each field appears below. |
| Name | The label staff will see, e.g. Fencing Type. Keep it short — it is used as-is on screen and on printed forms. |
| Type | The kind of answer — see Field types. |
| Options | Only used by the two list types. Type the choices separated by ::, for example Colorbond::Chainlink::Timber::Aluminium. |
| Required | Yes forces staff to answer before they can save. No leaves it optional. See Force Required. |
::
option list when the type is Select Multiple. If you are creating a
Select Dropdown, add the field first, then click its row and enter the options
in the edit window — the edit window handles both list types correctly.
Field types
| Type | What staff see | Uses Options? |
|---|---|---|
| Text | A single-line box. Anything can be typed. | No |
| Number | A numeric box. | No |
| Date | A date box with a calendar picker. | No |
| Select Dropdown | A dropdown list. One choice only. | Yes |
| Select Multiple | An open list box. Staff can pick more than one. | Yes |
For the two list types, the Options box holds every choice separated by
a double colon — 1.2m::1.5m::1.8m::2.1m gives four choices. Spaces are
kept, so do not put a space either side of the :: unless you want it in the
choice itself.
Force Required — making a field mandatory
This is the setting that decides whether a field is a nuisance or a safety net, and it is entirely under your control.
- Required = Yes — the box is marked required, and Evolution refuses to save the record until it is filled in. Use it for the handful of things that must never be missing.
- Required = No — the box still appears on the screen, in the same place, and can still be filled in. It simply no longer blocks the save.
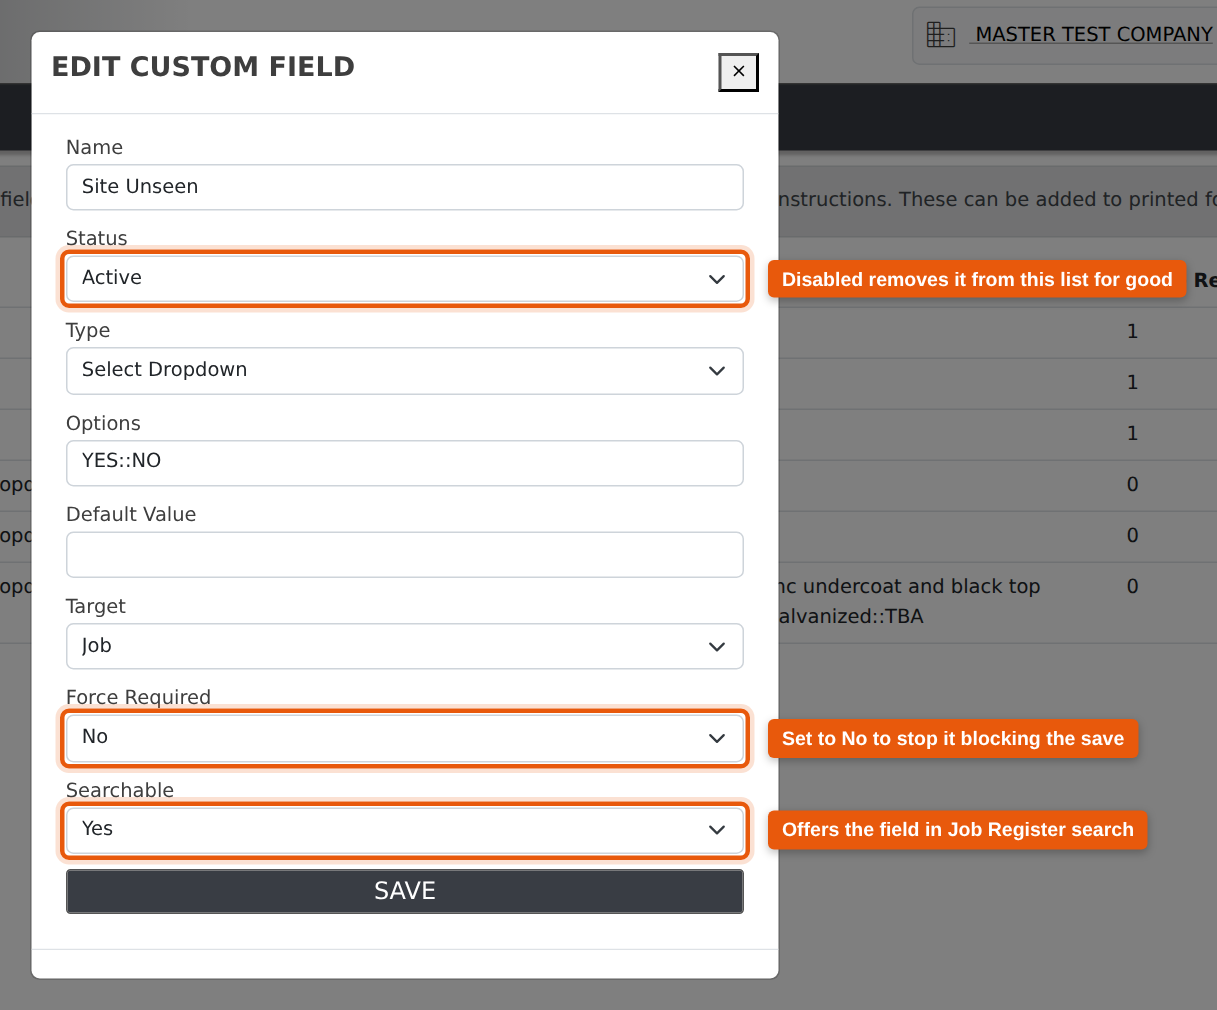
To change it, click the field’s row on the Custom Fields list, set Force Required to No and save. The change takes effect immediately for everyone — no re-login, no support request. Records already saved are untouched.
Editing a field
Click anywhere on a field’s row to open it. The edit window shows everything from the Add form plus three settings that only exist here:
| Setting | What it does |
|---|---|
| Status | Active shows the field on its target screen. Disabled removes it from the screen entirely without deleting any data already captured. |
| Default Value | For a Select Dropdown, the choice that is pre-selected on a new record. Staff can still change it. Leave blank for no default. |
| Searchable | Adds the field to Advanced Search on the Project Register, so you can filter projects by what was recorded in it. Only applies to fields targeted at Project. |
Where each field appears
The Target decides which screen your field shows up on:
| Target | Appears on |
|---|---|
| CRM Leads | New Lead, and the Custom Fields panel when a lead is opened. |
| CRM Opportunities | New Opportunity, and the Custom Fields panel when an opportunity is opened. |
| Project | The Custom Fields button on a project. These are also the only fields that can be made Searchable. |
| Defect | The defect record. |
| Quote Items - Append | Quote line items — the answers are appended to the line’s description on the quote. |
| Shop Floor Order | New and existing shop floor orders in Manufacture. |
| Site Instruction | The site instruction record. |
Custom field answers can also be placed on printed forms — quotes, works orders, site instructions — if your print templates are set up for it. Raise a support request if you want a custom field added to a form.
Searching on a custom field
Fields targeted at Project and marked Searchable appear under Advanced Search on the Project Register, letting you filter the register by what was recorded in them — every project of a given fencing type, for instance. Fields on other targets are recorded and printed but are not offered as search filters.

Practical advice
- Be sparing with Required. Every mandatory field is a stop sign in front of a staff member who may legitimately have nothing to put in it. Reserve it for information the business genuinely cannot proceed without.
- Use lists rather than free text where the answer is one of a known set. Typed answers drift — 1.8, 1.8m, 1800 and 1.8 metres are four different answers to a reporting tool.
- Name fields for what they hold, not for the process around them. The name appears on screen and on printed forms exactly as typed.
- Review the list once a year. Fields accumulate. If nobody can explain what a field is for, it is probably time it stopped being compulsory.
Related Pages
- Setting Permissions — granting the Administrator access this screen requires.
- Accounts & Contacts from an Opportunity — the New Opportunity screen custom fields appear on.
- Projects — where Project custom fields and Advanced Search are used.
- Product Attributes — the equivalent concept for inventory items.