
Product attributes are the reusable characteristics you record against your inventory — things like colour, diameter, material grade, finish or any other property you want to capture. You define an attribute once, group it onto one or more product categories, and then enter a value for it against each item in those categories.
Because attributes are defined centrally, the same attribute (for example Colour) can be shared across many categories, and reporting stays consistent. Attributes also feed into job costing and timesheet tracking depending on the Attribute Type you choose — see the field reference below.
Where to Find It
Inventory → Product Attributes (the Attributes step in the Inventory pipeline: Categories → Attributes → Inventory → Tools).
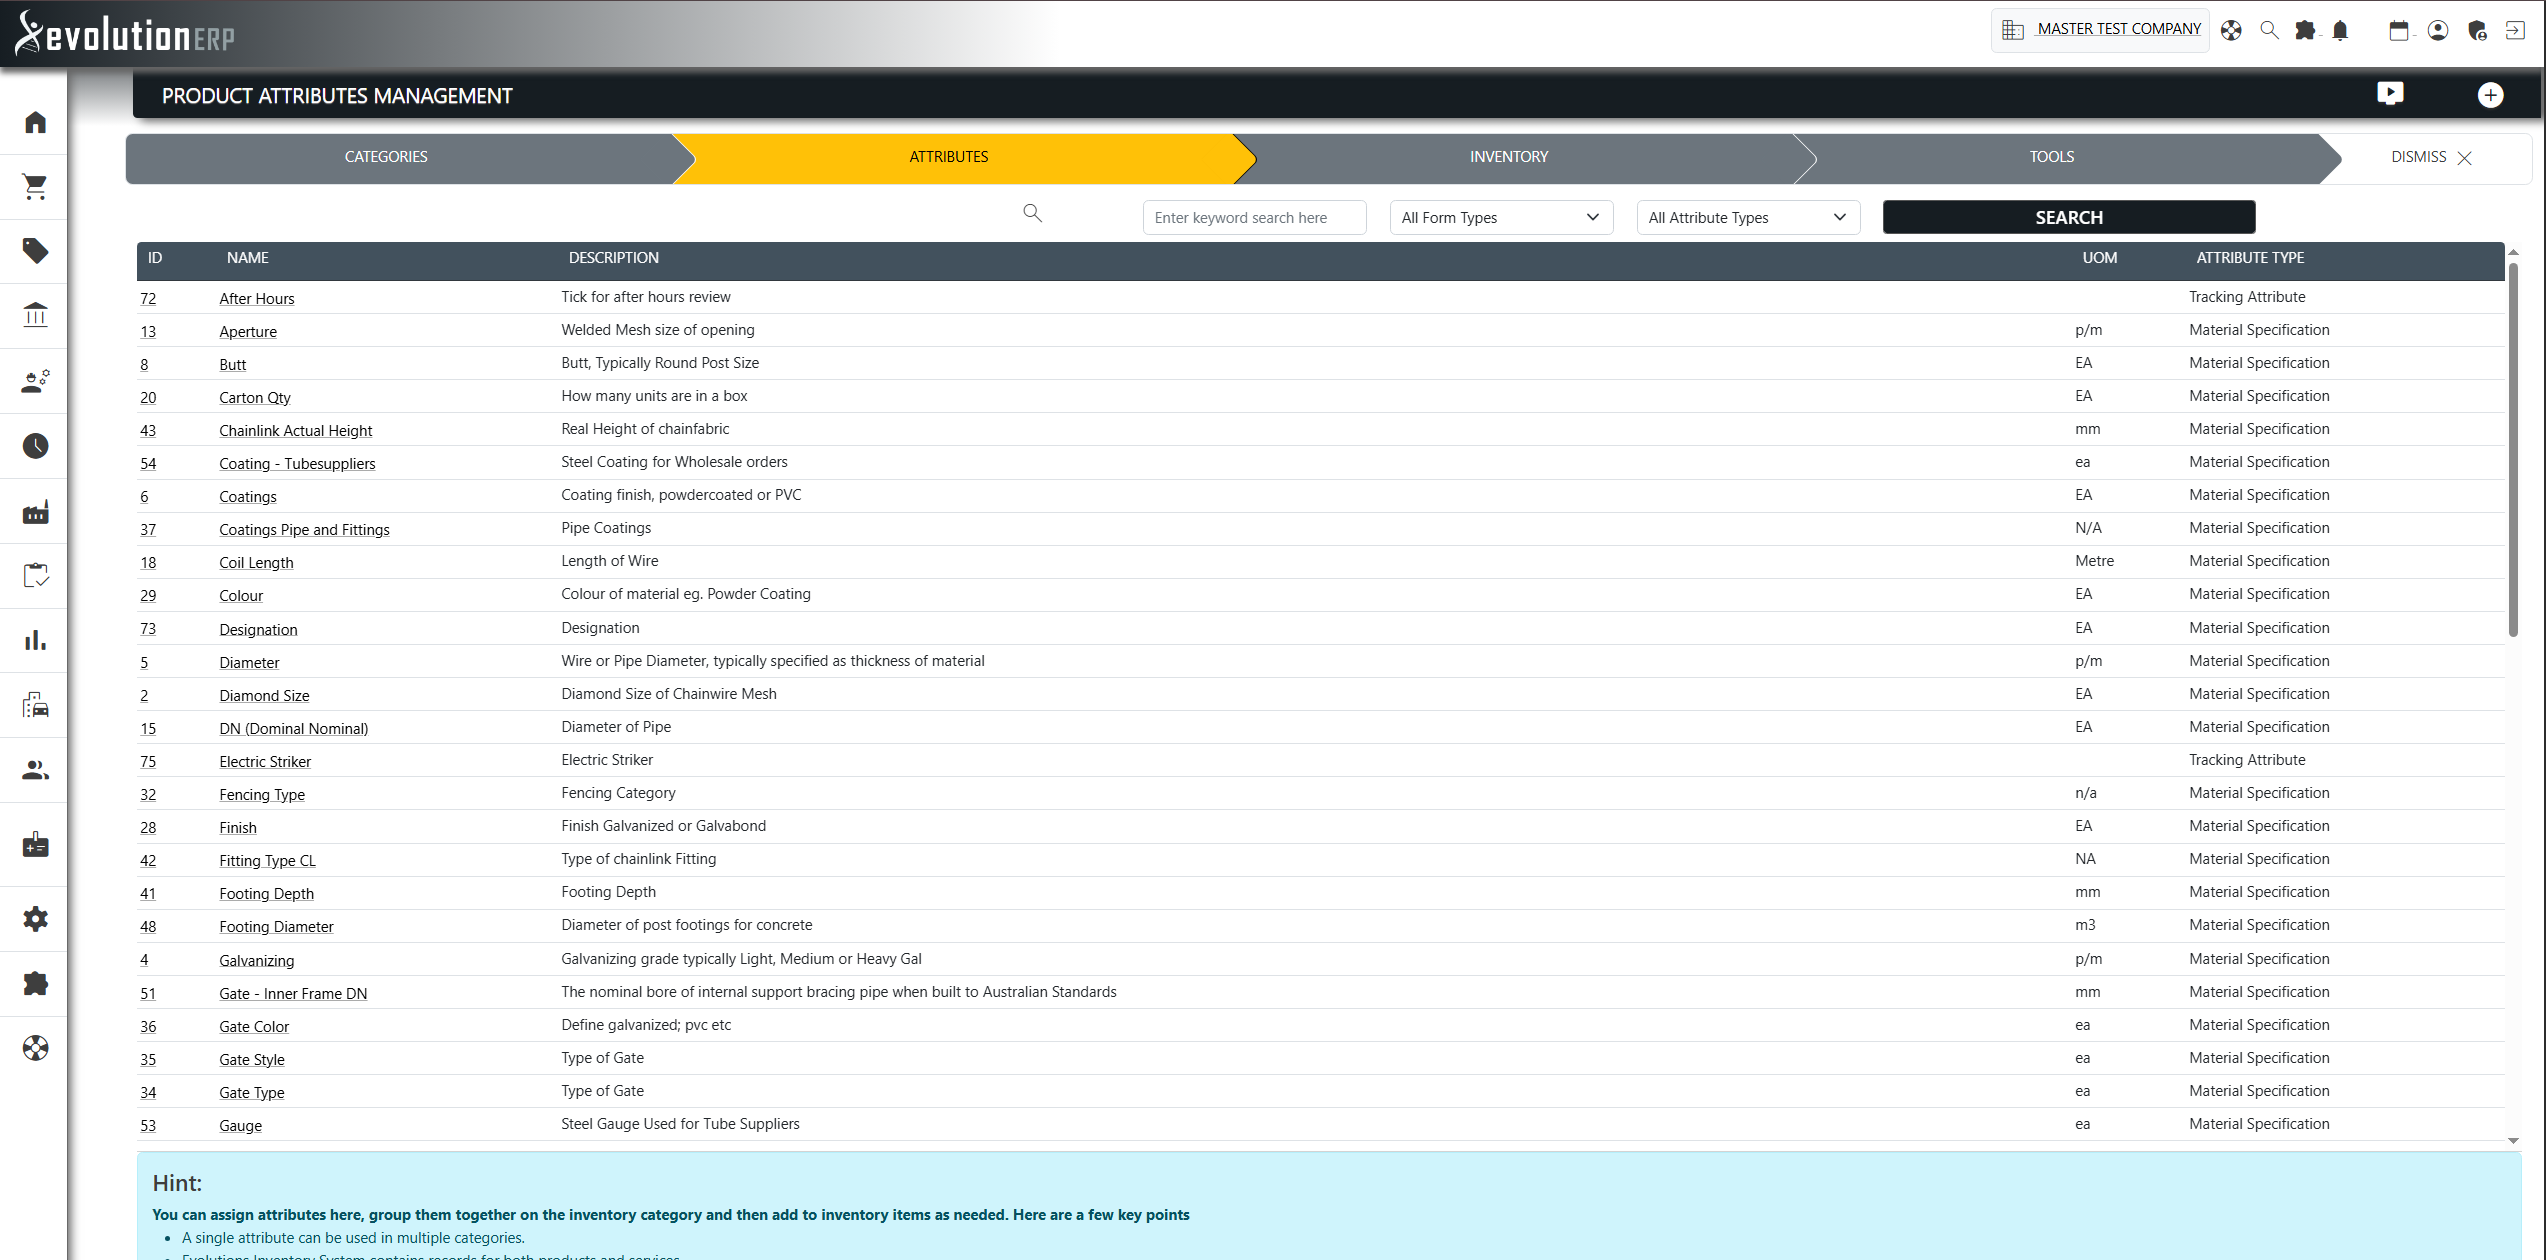
This opens the Product Attributes Management register, which lists every attribute already defined, with a keyword search and filters for Form Type and Attribute Type. To create a new one, click the add_circle_outline (add) icon in the top-right of the page header.
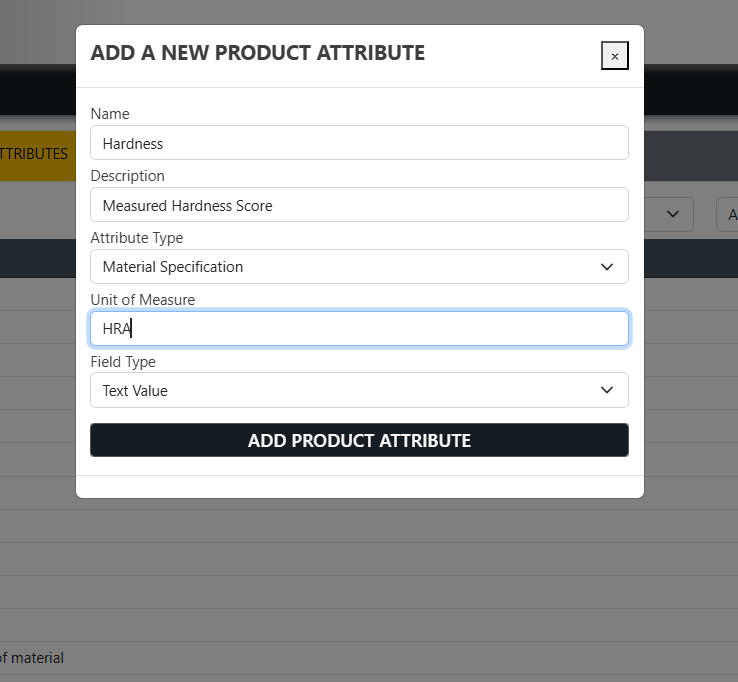
The Add Product Attribute Form
Clicking the add icon opens the “Add a new product attribute” window. Each field is described below.
| Field | Required | What it does |
|---|---|---|
| Name | Yes | The label for the attribute, e.g. Colour, Diameter or Material Grade. This is what appears as the column heading when the attribute is shown on a category and on each inventory item. Names must be unique and are limited to 35 characters, so keep them short and recognisable. |
| Description | Yes | A short explanation of what the attribute is for (up to 155 characters). It is shown in the attribute register and helps staff pick the correct attribute when there are several similar ones. |
| Attribute Type | Yes |
Determines how the attribute behaves elsewhere in the system. Choose one of:
|
| Unit of Measure | No |
An optional unit shown alongside the value, e.g. mm,
kg or L (up to 10 characters). Leave blank for
attributes that don’t need a unit, such as colour.
|
| Field Type | Yes |
Controls how a value is entered against an item when this attribute is used:
|
| Options | Only for drop-downs |
The list of choices for a Drop Down Menu attribute, entered
as comma-separated, quoted values — for example
'Red', 'Green', 'Blue'. This field is hidden unless Field Type
is set to Drop Down Menu.
Note: changing these options later affects
every inventory item that already uses this attribute, so edit
them carefully.
|
Click Add Product Attribute to save. The new attribute appears immediately in the register, ready to be attached to a category.
How Attributes Are Used
Creating the attribute is the first step. To put it to work:
- Attach it to a product category. Open the relevant category under Inventory → Categories and add the attribute to it. A single attribute can be attached to as many categories as you like.
- Enter values on each item. Items in that category gain an Attributes tab. Open an item, click Add Attributes, and fill in the value for each attribute (a text box, number, or drop-down, depending on the Field Type you chose).
- Report and cost. Material Specifications are available for filtering and reporting, Cost Attributes flow into job costing, and Tracking Attributes are captured against staff time in the Timesheet system.
Editing an Existing Attribute
Click any attribute in the register to open the Edit Product Attribute Definition screen. There you can change its name, description, unit, field type, drop-down options and attribute type, and you can see a list of the categories that currently use it. Remember that changes — especially to drop-down options — apply to all items already using the attribute.