
The Carriers screen holds the couriers and freight companies your business ships with — Australia Post, StarTrack, your local courier, the transport company that takes your pallets. Every dispatch picks its carrier from this list, the invoice Ship Via field offers the same list, and each carrier’s tracking link is what turns a con note into a link your staff and customers can click.
Find it under Shipping → Carriers in the menu, or from the Manage carriers link on any dispatch’s Freight & Tracking card.
New databases start with twelve common Australian carriers already listed. Six of them — Australia Post, StarTrack, Aramex, Couriers Please, TNT and Sendle — come with their tracking link filled in. The rest have no link until you add one, and you can add your own carriers alongside them.
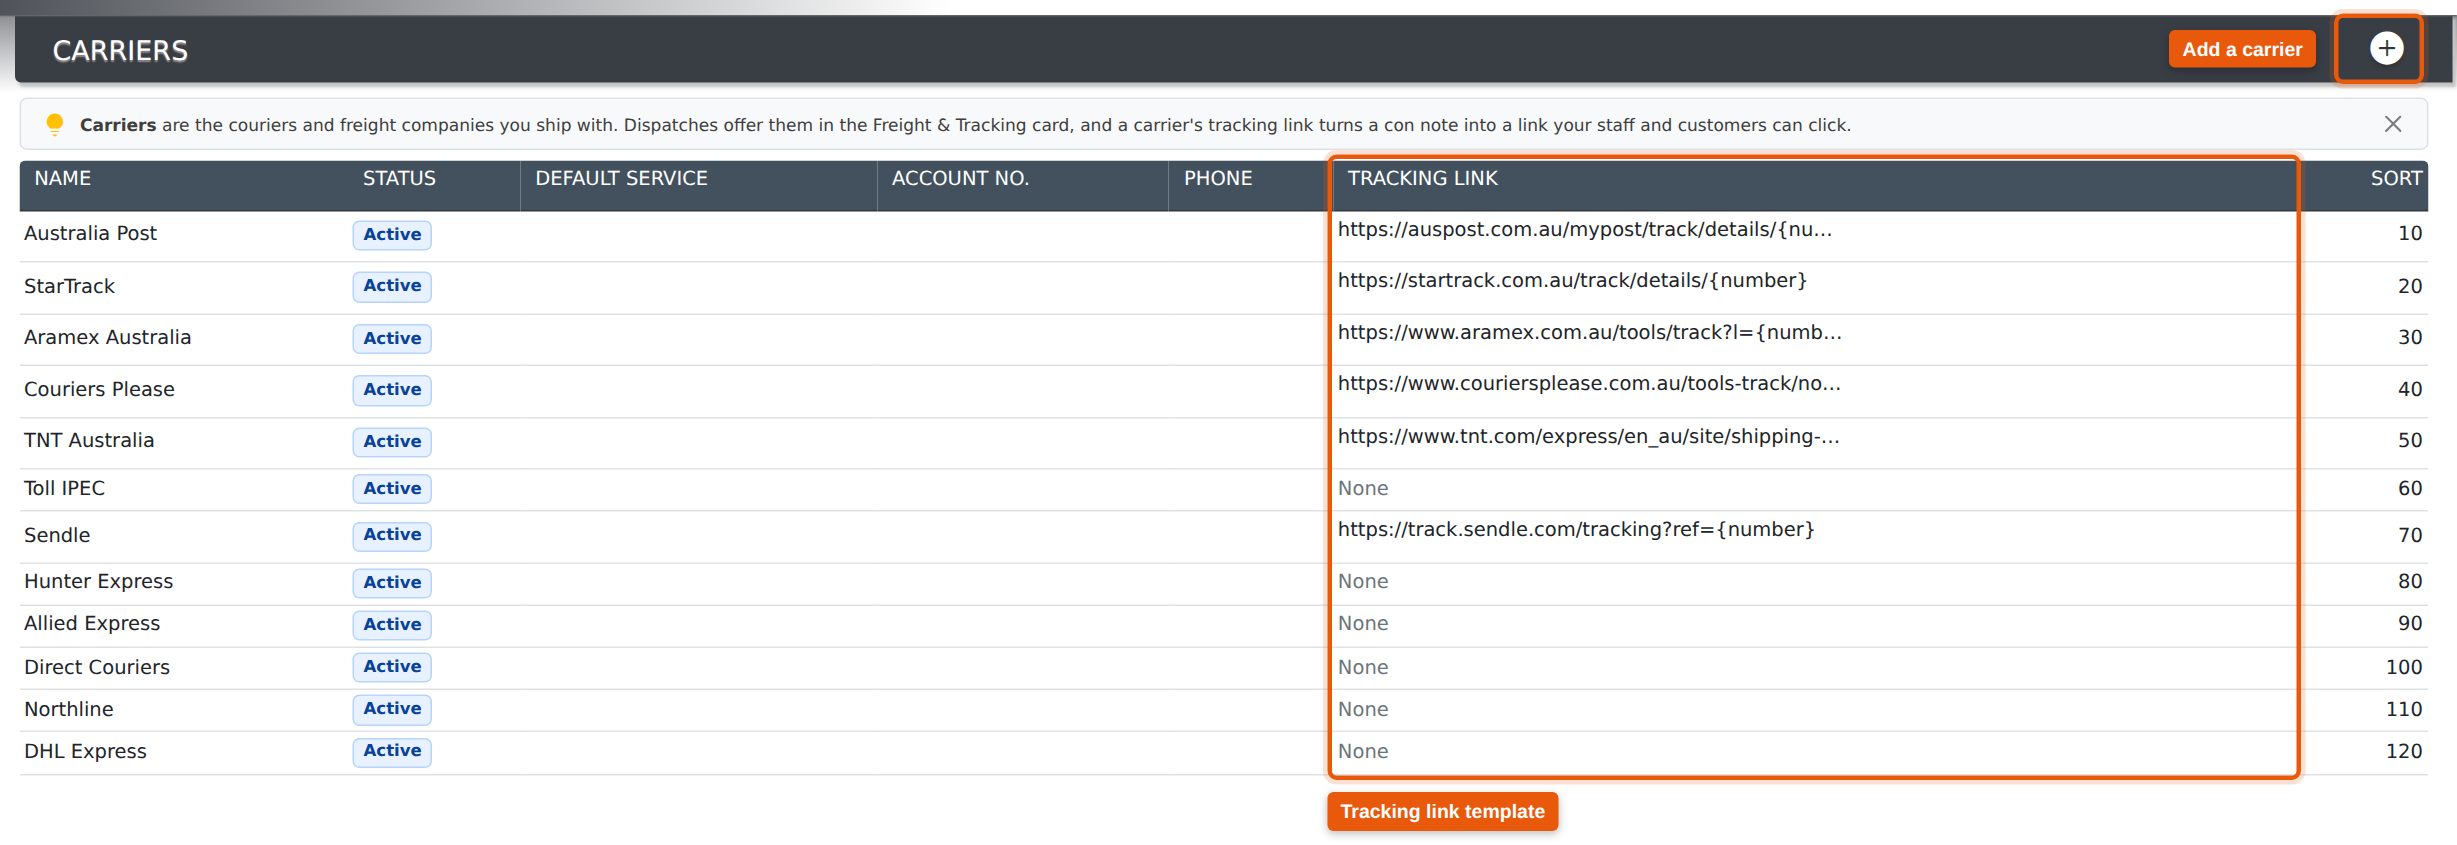
What Each Field Is For
| Field | What it does |
|---|---|
| Name | The carrier as your staff and customers know it. It shows in the carrier list on dispatches, on the invoice Ship Via, on the delivery docket and in the tracking email. Required, and no two carriers can share a name. |
| Status | Active or Disabled. See Editing or Disabling a Carrier. Only shown when editing — a new carrier is always active. |
| Default service | The service you normally book with this carrier — Express, Road, Overnight. When someone picks the carrier on a dispatch, an empty Service box is filled with this. Whatever is already typed there is kept. |
| Sort order | Where the carrier sits in the lists. Lower numbers come first, so give the carriers you use most a low number. Carriers with the same number are listed alphabetically. |
| Tracking link |
The address of the carrier’s tracking page, with {number}
where the con note goes. See Tracking Links.
|
| Transit days | How long the carrier usually takes to deliver. The Shipping hub uses it for each consignment’s expected date. See Transit Days. |
| Logo and Brand colour | How the carrier is recognised at a glance on dispatches and in the Shipping hub. See Logo and Brand Colour. |
| Account no. and Phone | Your account number with the carrier and their booking number, kept here so whoever books the freight has them to hand. |
Tracking Links
Most carriers have a public page that shows where a consignment is, and the con note
number is part of its address. Paste that address into Tracking link
and replace the number with {number}. For example, StarTrack’s is:
https://startrack.com.au/track/details/{number}
Evolution then builds the link for every dispatch on that carrier by putting its con
note into the {number} slot. You never type a tracking link on a
dispatch again.
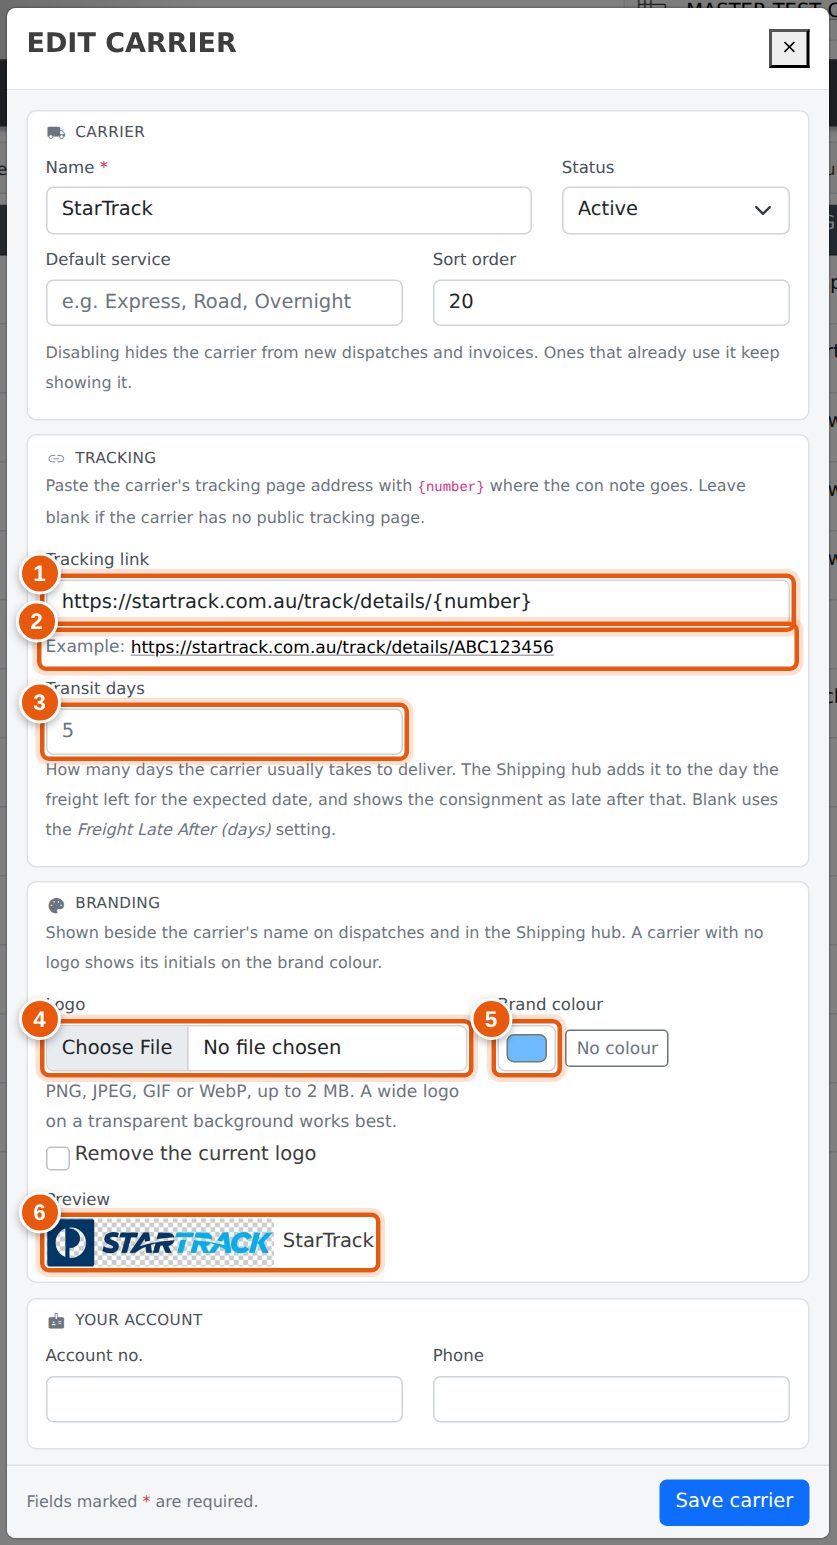
- Tracking link — the template, with
{number}where the con note goes. - Example — as you type, Evolution shows the link it would build for a sample con note. Click it to check that the carrier’s page opens the way you expect.
- Transit days — see Transit Days.
- Logo — see Logo and Brand Colour.
- Brand colour.
- Preview — exactly how the carrier will appear on dispatches and in the Shipping hub.
{number}. The
link then opens that page and the person looks the con note up themselves. The list
shows these as Search page only.
http:// or https://. Anything else
is refused when you save, because the link is printed on dockets and sent to your
customers.
Leave the tracking link blank for a carrier with no public tracking page, such as your own truck or a local courier. Dispatches on that carrier still record the con note. They just have no link.
Transit Days
Enter the number of days the carrier usually takes to deliver once it has the goods. The Shipping hub adds it to the day the freight left to give each consignment an expected date. A consignment that still isn’t delivered after that date is shown as Late.
Leave it blank to use the Freight Late After (days) setting (Settings → Settings, PROJECTS tab) instead. The box shows that setting’s value in grey as a reminder.
Logo and Brand Colour
Staff pick a carrier out by its logo much faster than by reading its name. Give each carrier a logo and it is shown next to the carrier’s name on this list, on the dispatch’s Freight & Tracking card and throughout the Shipping hub.
- Logo — a PNG, JPEG, GIF or WebP image up to 2 MB. A wide logo on a transparent background works best. Evolution resizes it for you. SVG files aren’t accepted.
- Remove the current logo — tick and save to go back to no logo.
- Brand colour — the carrier’s colour. A carrier with no logo shows its initials on this colour, and the Shipping hub uses it for that carrier’s bar in Freight by carrier. Press No colour to clear it.
The Preview updates as you choose, so you can see the result before you save. Changes to the logo and colour are written to the carrier’s History.
Adding a Carrier
- Press the + button at the top right of the screen.
- Enter the Name and, if you have them, the default service, tracking link, transit days, logo, brand colour, account number and phone.
- Press Add carrier. The carrier is active straight away and appears on dispatches and invoices.
A carrier can’t be added with the same name as one already on the list, even a disabled one. You are told which, so you can re-enable that one instead.
Editing or Disabling a Carrier
Click anywhere on the carrier’s row and the edit window opens. Change what you need and press Save carrier.
Carriers aren’t deleted, because past dispatches and invoices still refer to them. To stop using one, set its Status to Disabled. It drops out of the list on new dispatches and invoices. Ones that already use it keep showing it, marked (disabled), so nothing changes on existing records.
Where Carriers Are Used
- Dispatches — the Carrier list on the Freight & Tracking card, and the tracking link built from its con note. See Freight & Tracking on a Dispatch.
- The Shipping hub — booking, manifests and tracking, with each carrier’s logo, transit days and freight totals. See Shipping Hub.
- Invoices — the Ship Via field. An invoice raised from a dispatch takes the dispatch’s carrier.
- Delivery dockets — the
@carrier;and@trackingUrl;placeholders. - Tracking emails — the carrier name and a Track your delivery button, when that setting is on.
Who Can Change This
Adding and editing carriers needs Administrator access or Projects set to Admin. Everyone else can see the list but can’t change it — see Setting Permissions. Every add and change is recorded in the audit log with what the field used to say.
Related Pages
- Freight & Tracking on a Dispatch — con notes, packages, freight charges and the tracking email.
- Shipping Hub — booking, manifests and tracking freight in one place.
- Invoicing a Dispatch — how the carrier and freight charge reach the invoice.
- Setting Permissions — granting Projects admin access.