
A purchase order (PO) is the document you send to a supplier to order goods. You can build a PO two ways: by importing open requisitions raised against your projects, or by adding items directly (for stock or workshop consumables). This page covers both, with a focus on bringing project requisitions onto a PO.
info For the difference between requisitions and purchase orders, see the Purchasing Overview. To raise the requisitions first, see Purchase Requisitions.
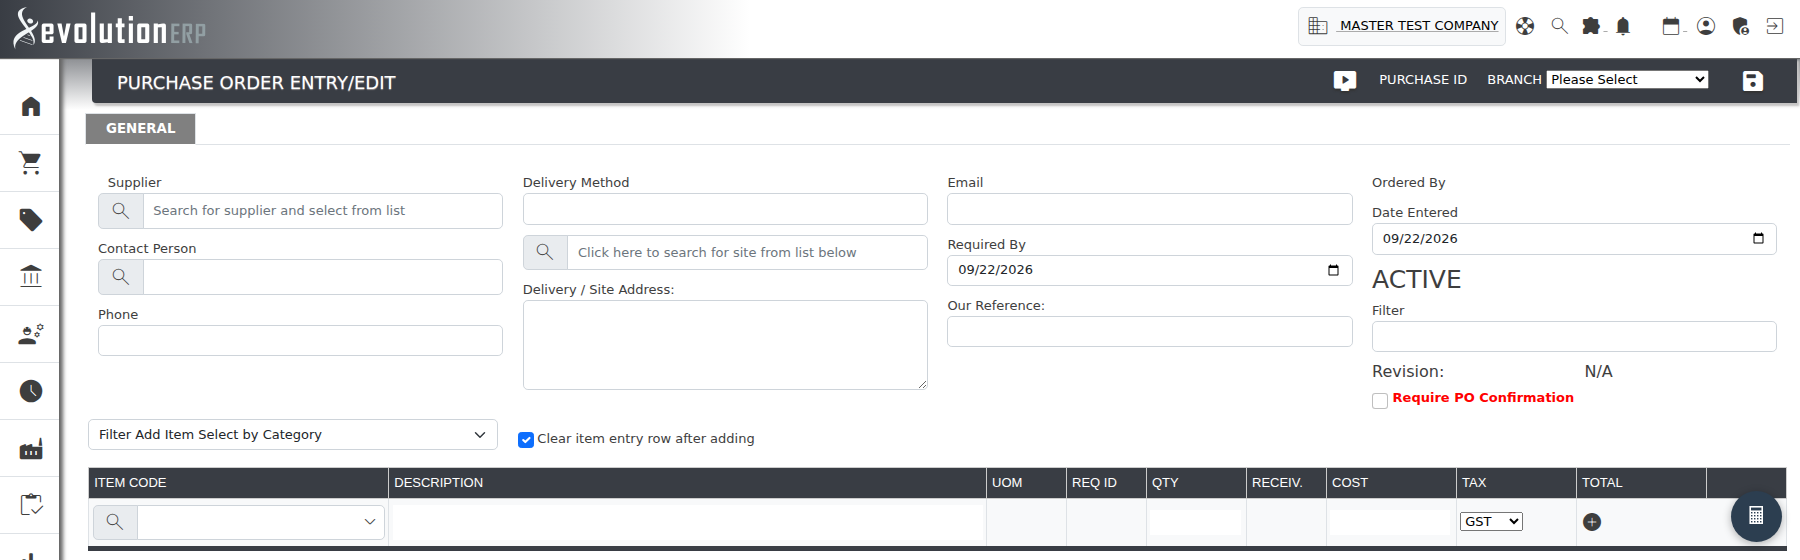
Creating a Purchase Order
- Go to Purchasing → Purchase Orders to open the purchase order register.
- Click the add_circle_outline add icon in the top-right corner to start a new PO.
- Select the vendor (supplier) you're ordering from.
- Click Save. A purchase order number is assigned (for example, PO 122).
You now have an empty purchase order against that vendor, ready for you to add items — either by importing requisitions or by entering lines directly.
Importing Requisitions onto the PO
This is how project requisitions become a real order to your supplier. With the purchase order open:
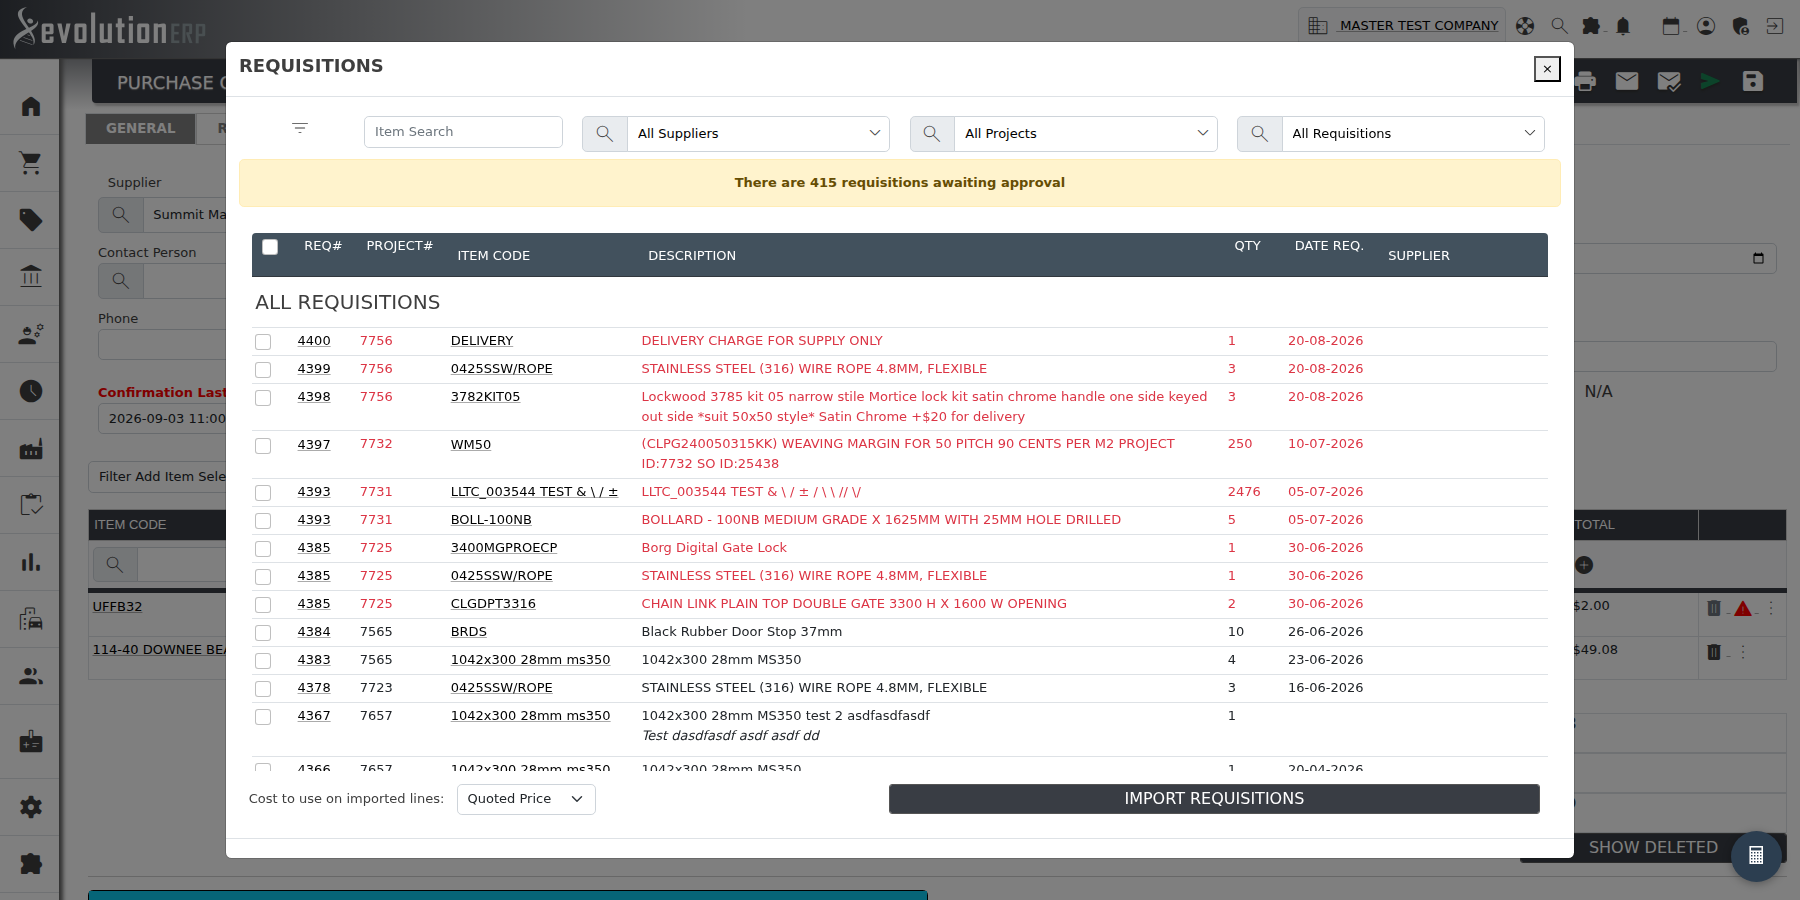
- Click the import_export import icon in the top-right of the purchase order — this opens the Requisitions window.
- Tick the requisition lines you want to bring onto this PO. They can come from one project or several.
- Click Import Requisitions, then Save the purchase order.
Finding the right requisitions
The import window groups the requisitions and gives you filters so you can find what you need on a busy list:
- Requisitions for this Supplier are listed first — the ones whose expected supplier matches the PO's supplier — followed by All Requisitions.
- Filter by item, vendor or project to narrow the list.
- Use the header checkbox to select or clear everything currently shown.
Cost used on imported lines
The Cost to use on imported lines option controls the buy price the imported lines land at:
| Option | What it uses |
|---|---|
| Quoted Price | The price captured when the item was quoted/requisitioned. |
| Inventory Price | The item's current cost from inventory. |
Your administrator can set a default for this under Settings, so it's usually already on the option you want.
Adding Items Directly (Stock & Consumables)
When the order isn't tied to a project — replenishing stock, or buying workshop consumables — you don't need requisitions at all. Create the PO against the vendor as above, then add the items straight onto the order lines and save. See the Purchasing Overview for when to take this route versus raising requisitions.
Sending the PO to Your Supplier
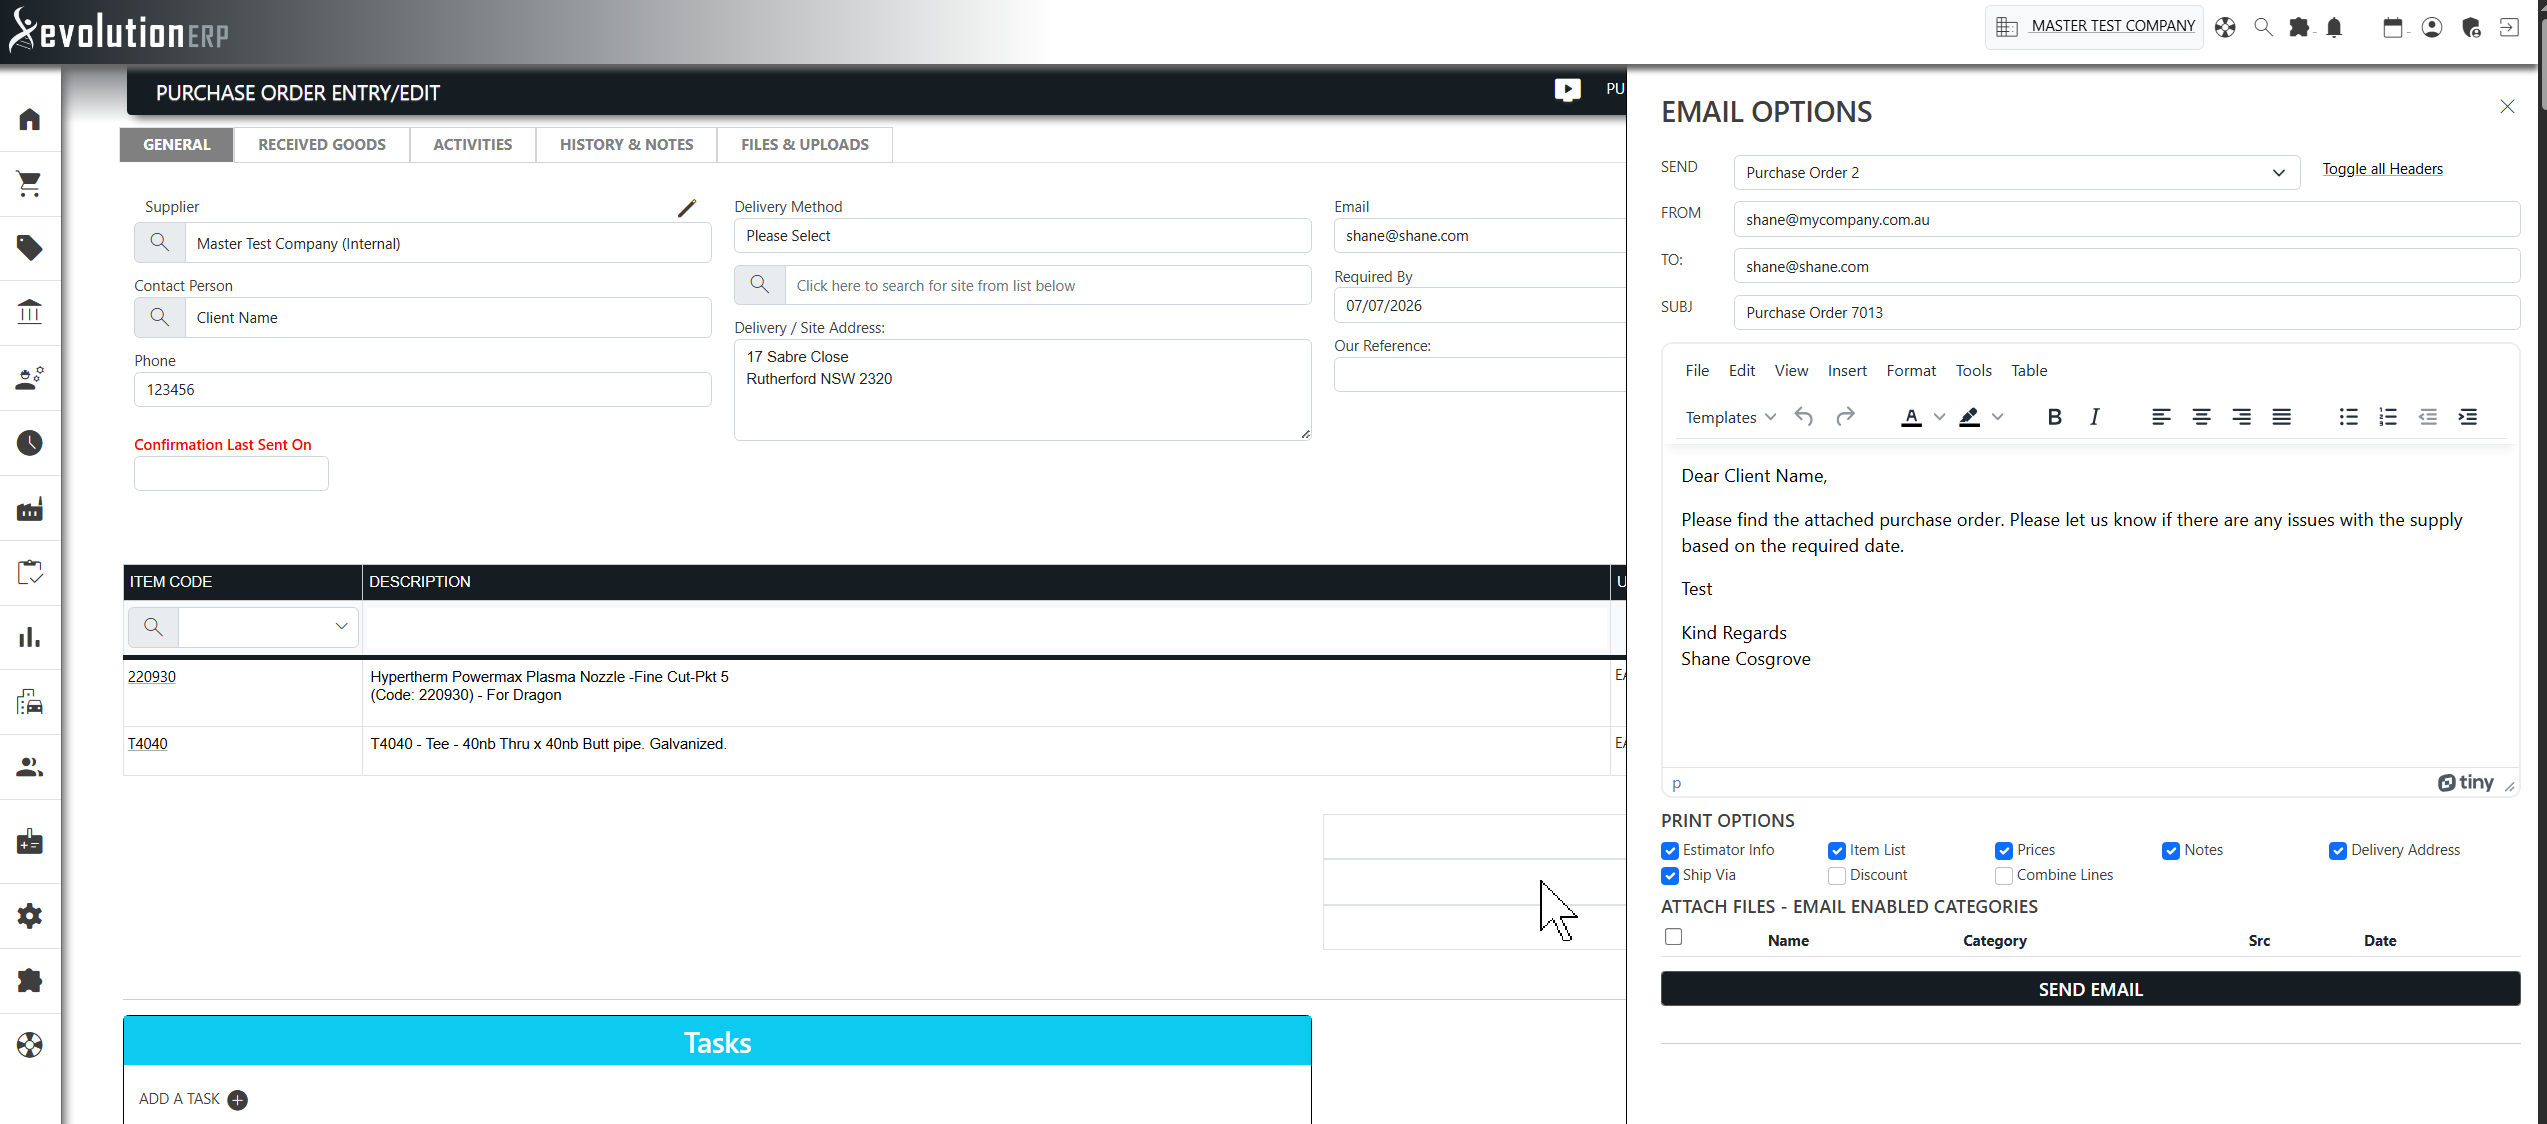
Once the lines are on the purchase order, send it to the supplier using the icons in the top-right of the PO:
- print Print — produce a printable copy of the purchase order.
- email Email — email the PO straight to your vendor.
mark_email_read If purchase order confirmations are enabled, an email-confirmation option is also available so you can record the vendor's acknowledgement.
Back on the Project
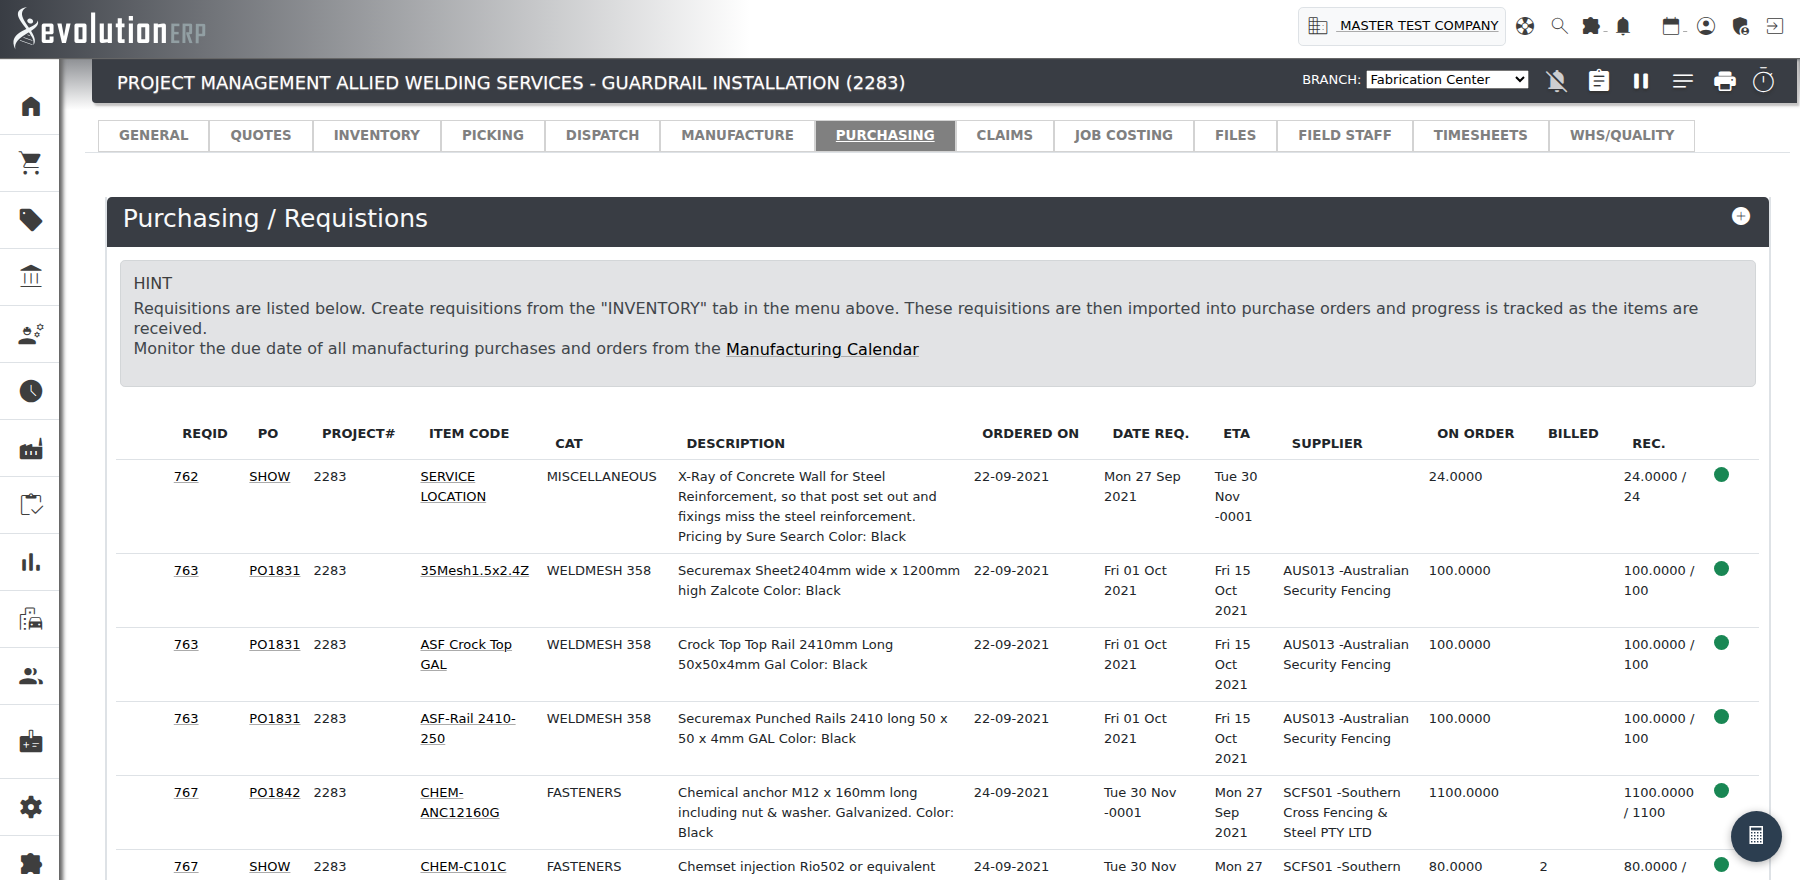
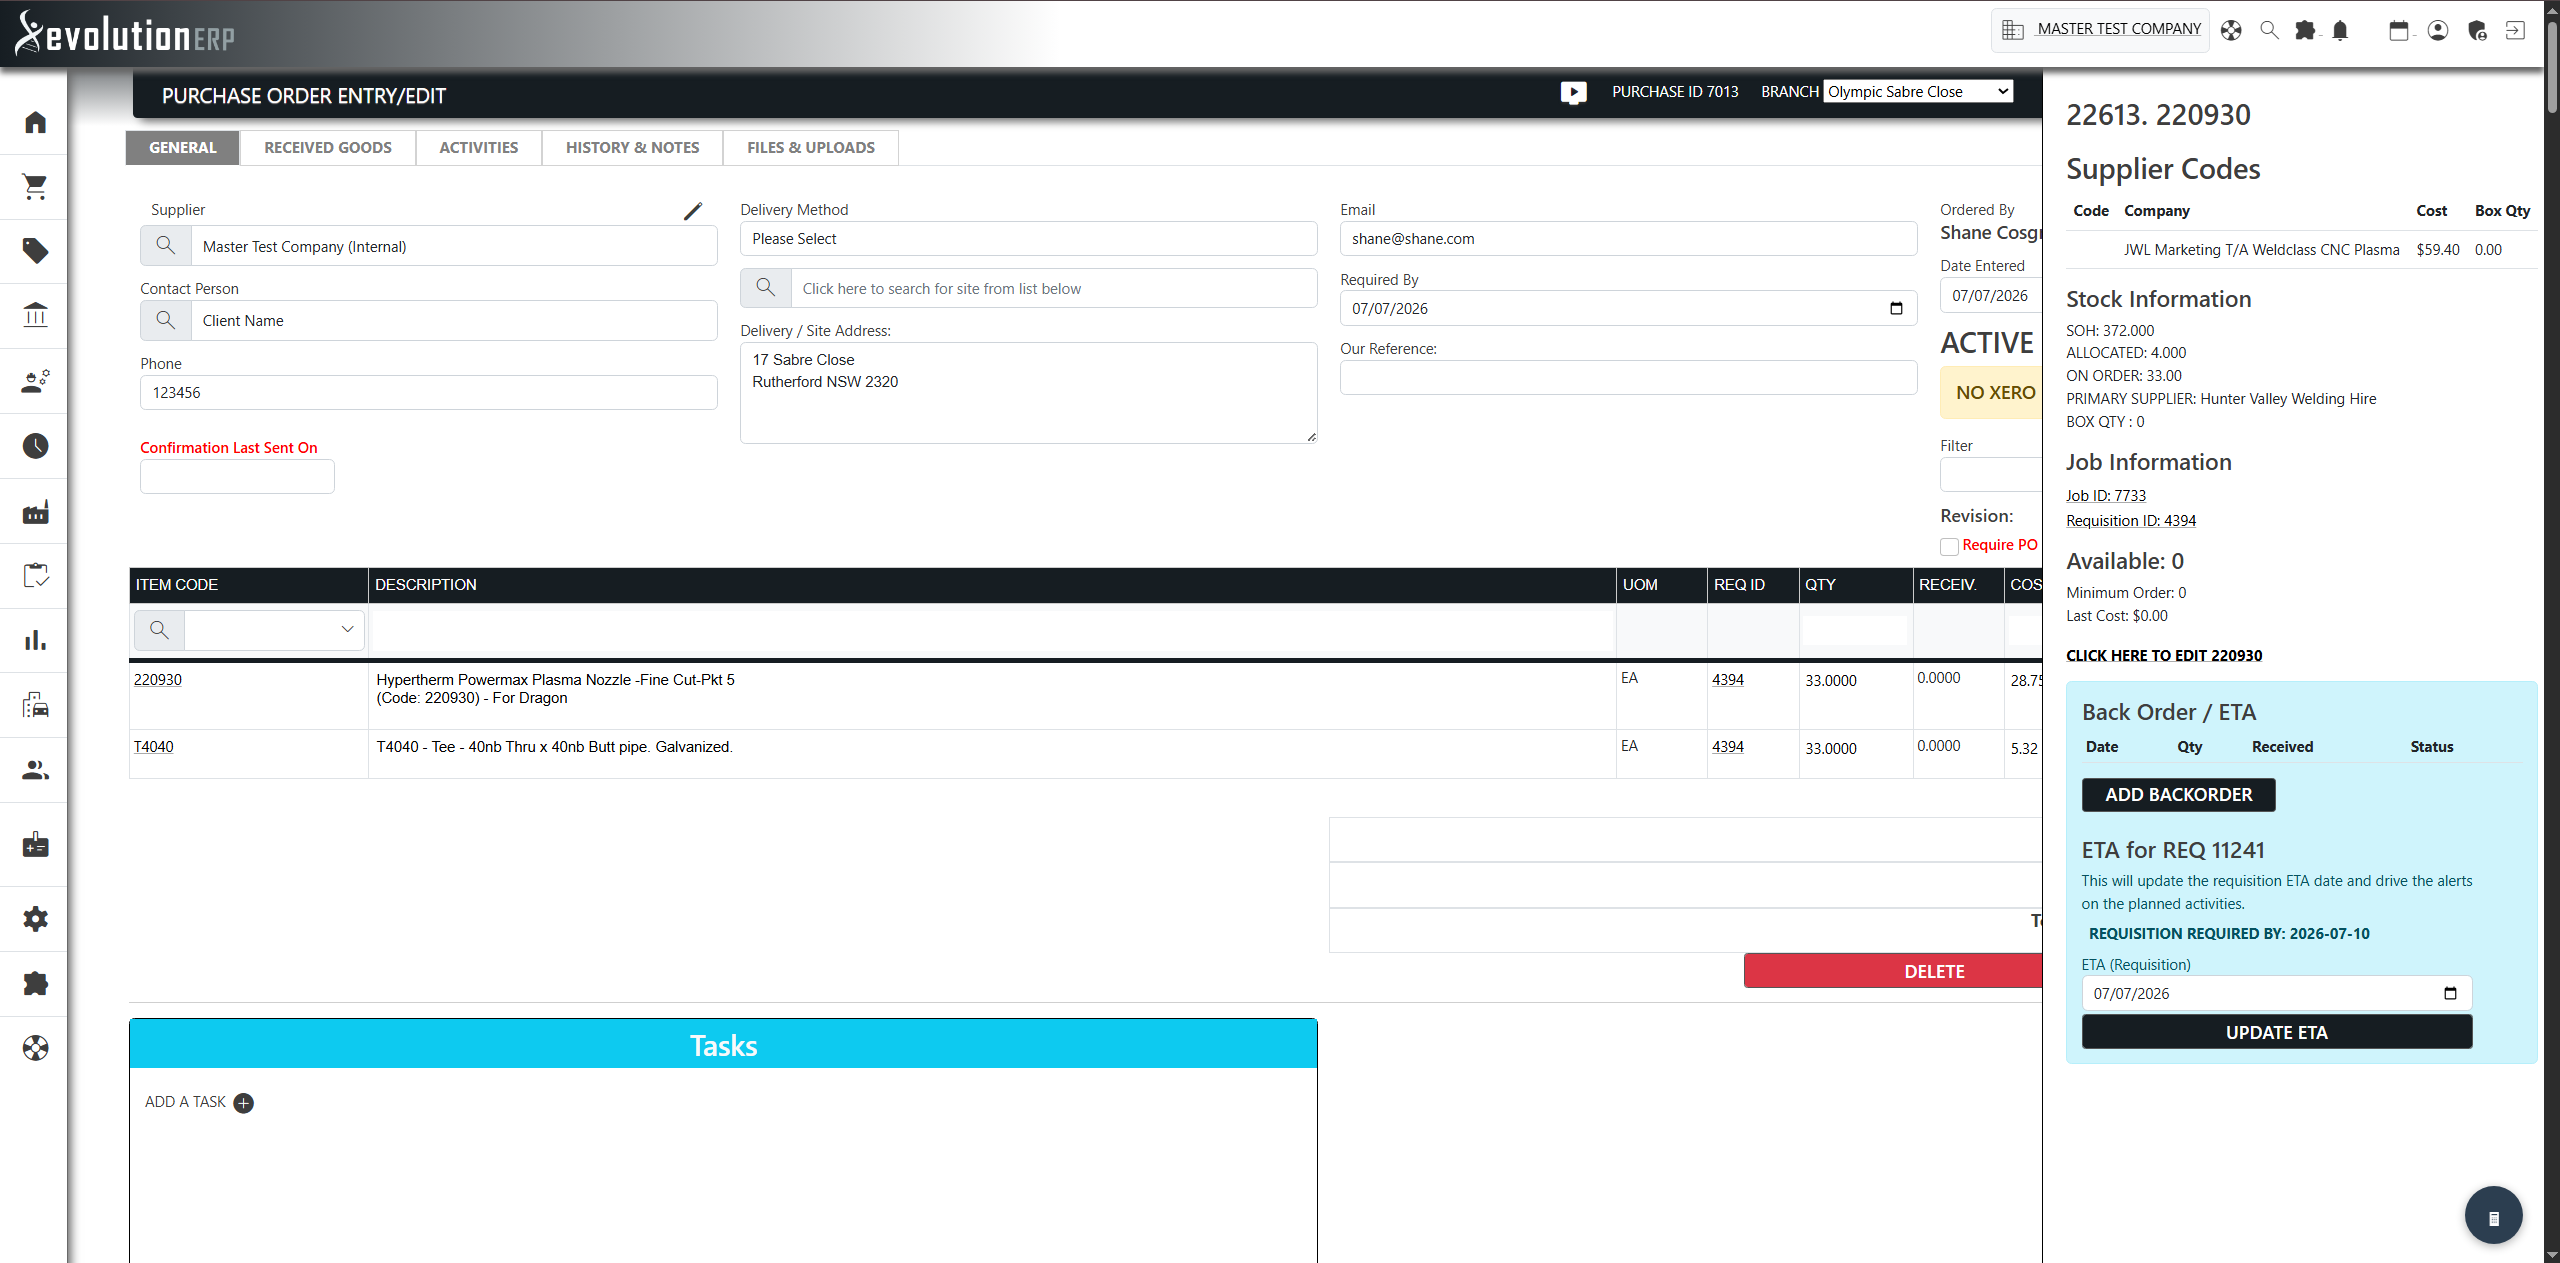
Importing the requisitions closes the loop with the project. On the project's Purchasing tab (headed Purchasing / Requisitions) you'll now see those items as ordered: the PO number becomes a link to the purchase order, and the Ordered On, ETA and Supplier columns fill in. Each line's status dot moves from red (requisitioned) to yellow (on order), then to green once the goods are received.
On a PO line, the three-dot menu shows the item's available stock and which project and requisition it belongs to — with a link straight through to that project. And in Purchasing → Requisitions, those same requisitions now show the PO they're on and an ordered status.
Receiving & Billing
From here the purchase order follows the rest of the purchasing pipeline: goods are received against the PO (fully or partially — the received status updates on both the PO and the project), any outstanding quantities become back orders, and the supplier invoice is entered as a bill in Accounts Payable.
route Pipeline: Project → Purchase Requisitions → Purchase Orders → Accounts Payable.