
Bill Entry
A bill is a supplier invoice recorded in Accounts Payable — it represents money your business owes a supplier for goods or services. The Bill Entry screen is where you enter those supplier invoices, allocate their cost, and prepare them for payment.
Opening the Bill Entry screen
Bills are managed from the AP Invoice Register. To create a new bill, open the register and start a new entry; to edit an existing one, open it from the register list.
Bills can also be created directly from a purchase order — see Creating Bills from Purchase Orders.
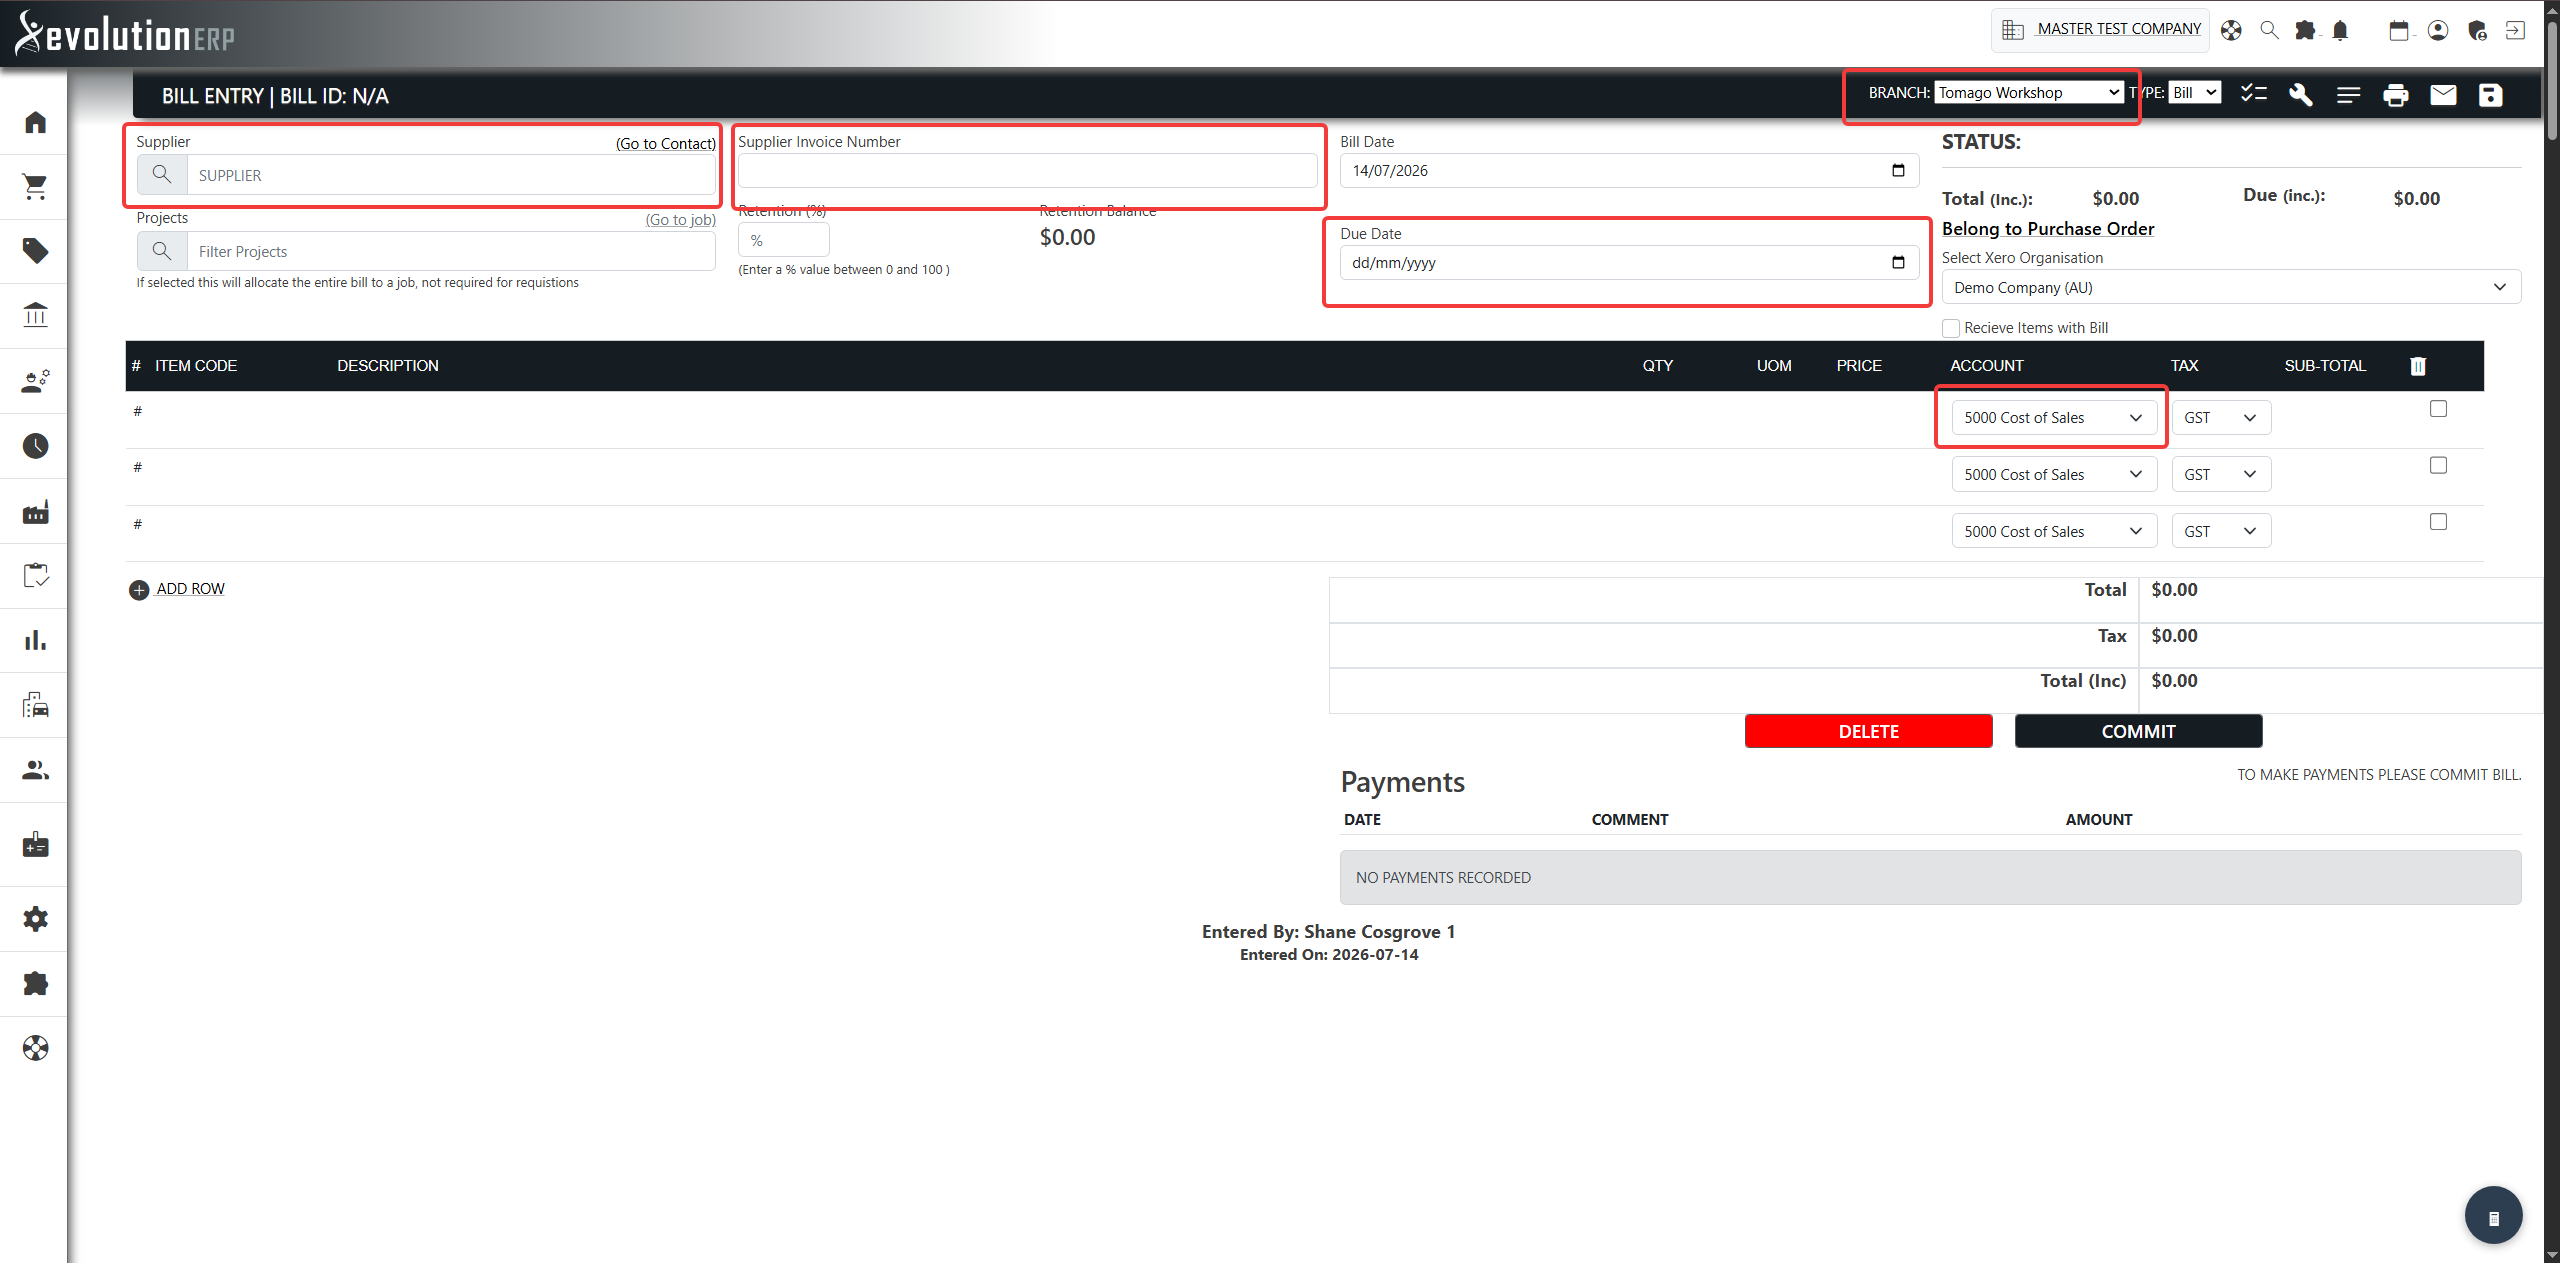
Bill header details
The top of the bill captures who the bill is from and its key dates:
| Field | What it’s for |
|---|---|
| Supplier Required | The supplier the bill is from. Start typing to filter the list, then select the supplier. The (Go to Supplier) link opens the supplier’s account record. |
| Project | Optional. If a project is selected here, the entire bill is allocated to that project. Leave it blank to allocate lines individually or by account (see Project Cost Allocation below). |
| Supplier Invoice Number Required | The invoice/reference number printed on the supplier’s invoice. Used to match and avoid entering the same invoice twice. |
| Bill Date | The date on the supplier’s invoice. Defaults to today. |
| Due Date Required | The date the bill must be paid by. This is filled in automatically from the supplier’s payment terms as soon as you pick the supplier (and recalculated if you change the Bill Date) — see Payment terms and the due date below. You can always override it by hand. |
| Branch Required | The branch the bill belongs to. |
| Type | Bill for a normal supplier invoice, or RCTI (Recipient Created Tax Invoice) where your business raises the tax invoice on the supplier’s behalf. |
| Retention (%) | Optional. Withholds a percentage of the bill as retention. The withheld amount is shown as the Retention Balance, which can be paid later via the Pay action. |
Payment terms and the due date
Every supplier can have their own payment terms — for example 30 Days Net, 14 Days Net, end-of-month or COD. When you select a supplier on a new bill, Evolution reads those terms and calculates the Due Date for you from the Bill Date, so you don’t have to work it out by hand. Change the Bill Date and the Due Date recalculates to match.
Setting a supplier’s terms
A supplier’s bill terms live on their contact record, in the Supplier Terms field (this is separate from Account Terms, which controls the due dates on invoices you send to a customer). Open the supplier’s contact and choose the appropriate entry from the Supplier Terms list.
The terms available in that list are the same ones your business maintains centrally, so you can add or rename them in one place and they apply everywhere.
supplier-terms.pngWhen a supplier has no terms set
If a supplier has no Supplier Terms selected — common for contacts imported from another system — the Due Date simply defaults to today, and a short note appears under the Due Date field:
This is just a prompt, not a block — you can still enter the Due Date manually and save the bill as normal. Setting the supplier’s terms once means every future bill for that supplier is dated automatically.
Bill lines
Each line of the bill records what you are being charged for. Add a line for every item or charge on the supplier’s invoice:
| Column | What it’s for |
|---|---|
| Item Code | Optional stock/inventory code. Start typing to filter and select a code; its description and unit of measure are filled in automatically. |
| Description | A description of the line. Populated from the item code, but you can edit it freely. |
| Qty | The quantity being billed. |
| UOM | Unit of measure (read-only, from the item). |
| Price | The unit price for the line. |
| Account Required | The general ledger account the line is posted to (for example an expense or asset account). |
| Tax | The tax code applied to the line. The tax amount is calculated for you. |
| Sub-Total | The calculated line total. The bill’s overall Total and Due figures update automatically as you enter lines. |
| Source | Shows where the line came from and links straight to it — a requisition/purchase order, a project cost allocation, or a manual entry. See Where a line came from below. |
Tick the delete box at the end of a line and save to remove it from the bill.

Where a line came from
Bill lines can arrive in several ways — imported from a purchase order, allocated against a project, or typed in by hand. The Source column on each line shows its origin and, where one exists, is a clickable link straight to the related record, so you can trace a charge back to its requisition or project without leaving the bill.
| Source shown | What it means & where the link goes |
|---|---|
| Req #nnn · Project | The line was brought in from a requisition / purchase order. The Req # link opens the requisition; when the requisition line is tied to a project, the project code is shown alongside and links to that project. |
| Project Alloc Project | The line is a project cost allocation — cost taken up against a project inventory line. The project code links to the project. A Takeup tag means the allocated quantity also updates the project line’s completed quantity. |
| Xero Adj | An adjustment line created automatically to reconcile the bill’s total with Xero. It is a bookkeeping artifact, not a purchased item. |
| Manual | The line was entered by hand directly on the bill and has no related source record. |
bill-line-source.pngAdditional options
Receive Items with Bill
Ticking this receives the bill’s stock items into inventory at the same time as recording the bill. (Not available when the bill was created from a purchase order, where goods are received against the PO instead.)
Project Cost Allocation
The checklist icon opens the Project Cost Allocation window, where the bill’s cost can be split across one or more projects — useful when a single supplier invoice covers work on several projects.
Notes
The notes icon opens a notes panel for recording internal comments against the bill.
Saving and committing a bill
Use the save save icon to save the bill. A bill moves through the following statuses:
Draft
The bill has been entered but not yet finalised. It can still be edited freely.
Committed
The bill is finalised and posted. It becomes read-only and is ready for payment. A payment can be added from the committed bill.
Deleted
The bill has been removed and no longer affects Accounts Payable.
If the bill was created from a purchase order, a Belongs to Purchase Order link is shown, taking you back to the originating PO.
Support
For help with Accounts Payable setup or posting accounts, please contact Evolution ERP Support.