
When a project item is designed or costed outside Evolution, its component list usually comes back as a spreadsheet. Import BOM takes that file and writes it straight onto the project line as its bill of materials, so you don’t have to key the components in one at a time in the BOM builder.
The importer works on one project line at a time, and it can also update the line’s description and special notes in the same step — the two things that most often change when a quoted item is confirmed as a deliverable and re-engineered.
Where to Find It
Open the project and go to its Inventory tab, then open the line you want to work on. In the item window, go to the Bill of Materials tab and click Import BOM, beside the BOM Builder button.
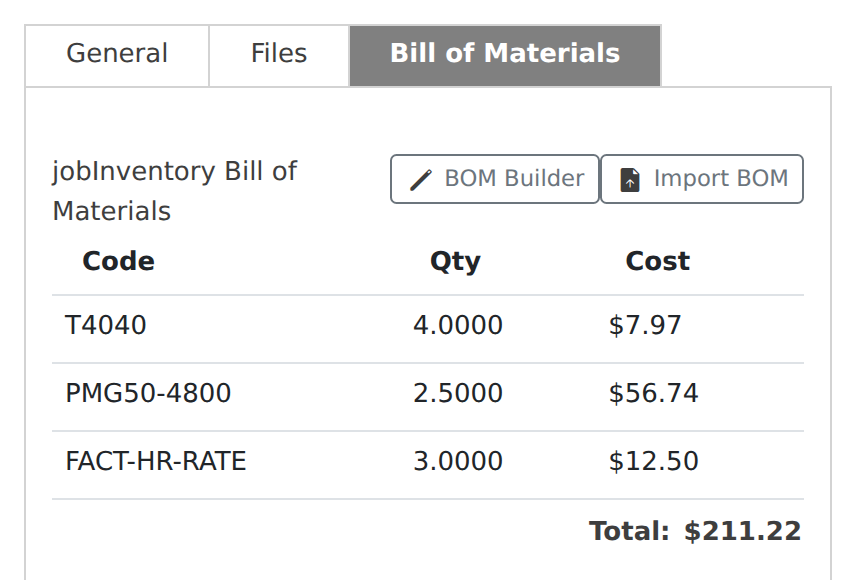
info The button only appears for staff with administrator access or Job Costing permission set to Admin, because importing overwrites a costed bill of materials.
Preparing the File
The file is a plain CSV with a header row. Column order does not matter and any extra columns are ignored, so an export from another system can usually be used as-is once the headings match. A starting point is linked in the window itself — Download the CSV template.
| Column | Required | What it holds |
|---|---|---|
item_code |
One of these two | The Evolution item code for the component. The importer looks the code up and links the row to that inventory item. |
item_id |
One of these two | The inventory item’s internal id, if the external system stores it. Used in preference to the code when both are supplied. |
qty |
Yes | How many of the component the assembly uses. Must be greater than zero. |
description |
No | The wording to show against the component on the BOM. Leave it empty to take the inventory item’s own description. |
cost |
No | Unit cost for the component. Leave it empty to take the item’s current cost from inventory — which is usually what you want, so the BOM costs at today’s prices. |
line_description |
No | New wording for the project line’s description. Read from the first row that carries it, and offered to you as an optional update. |
line_notes |
No | New wording for the project line’s special notes. Also read from the first row that carries it, and also optional. |
code,
part_number, quantity, unit_cost and similar
wordings are read as the equivalent column, so a file exported from another system rarely
needs re-titling. Blank rows are skipped, and the file may be up to 2 MB.
Reviewing the Preview
Choose the file and click Preview import. Nothing has been saved at this point — the window simply shows what the file will do.
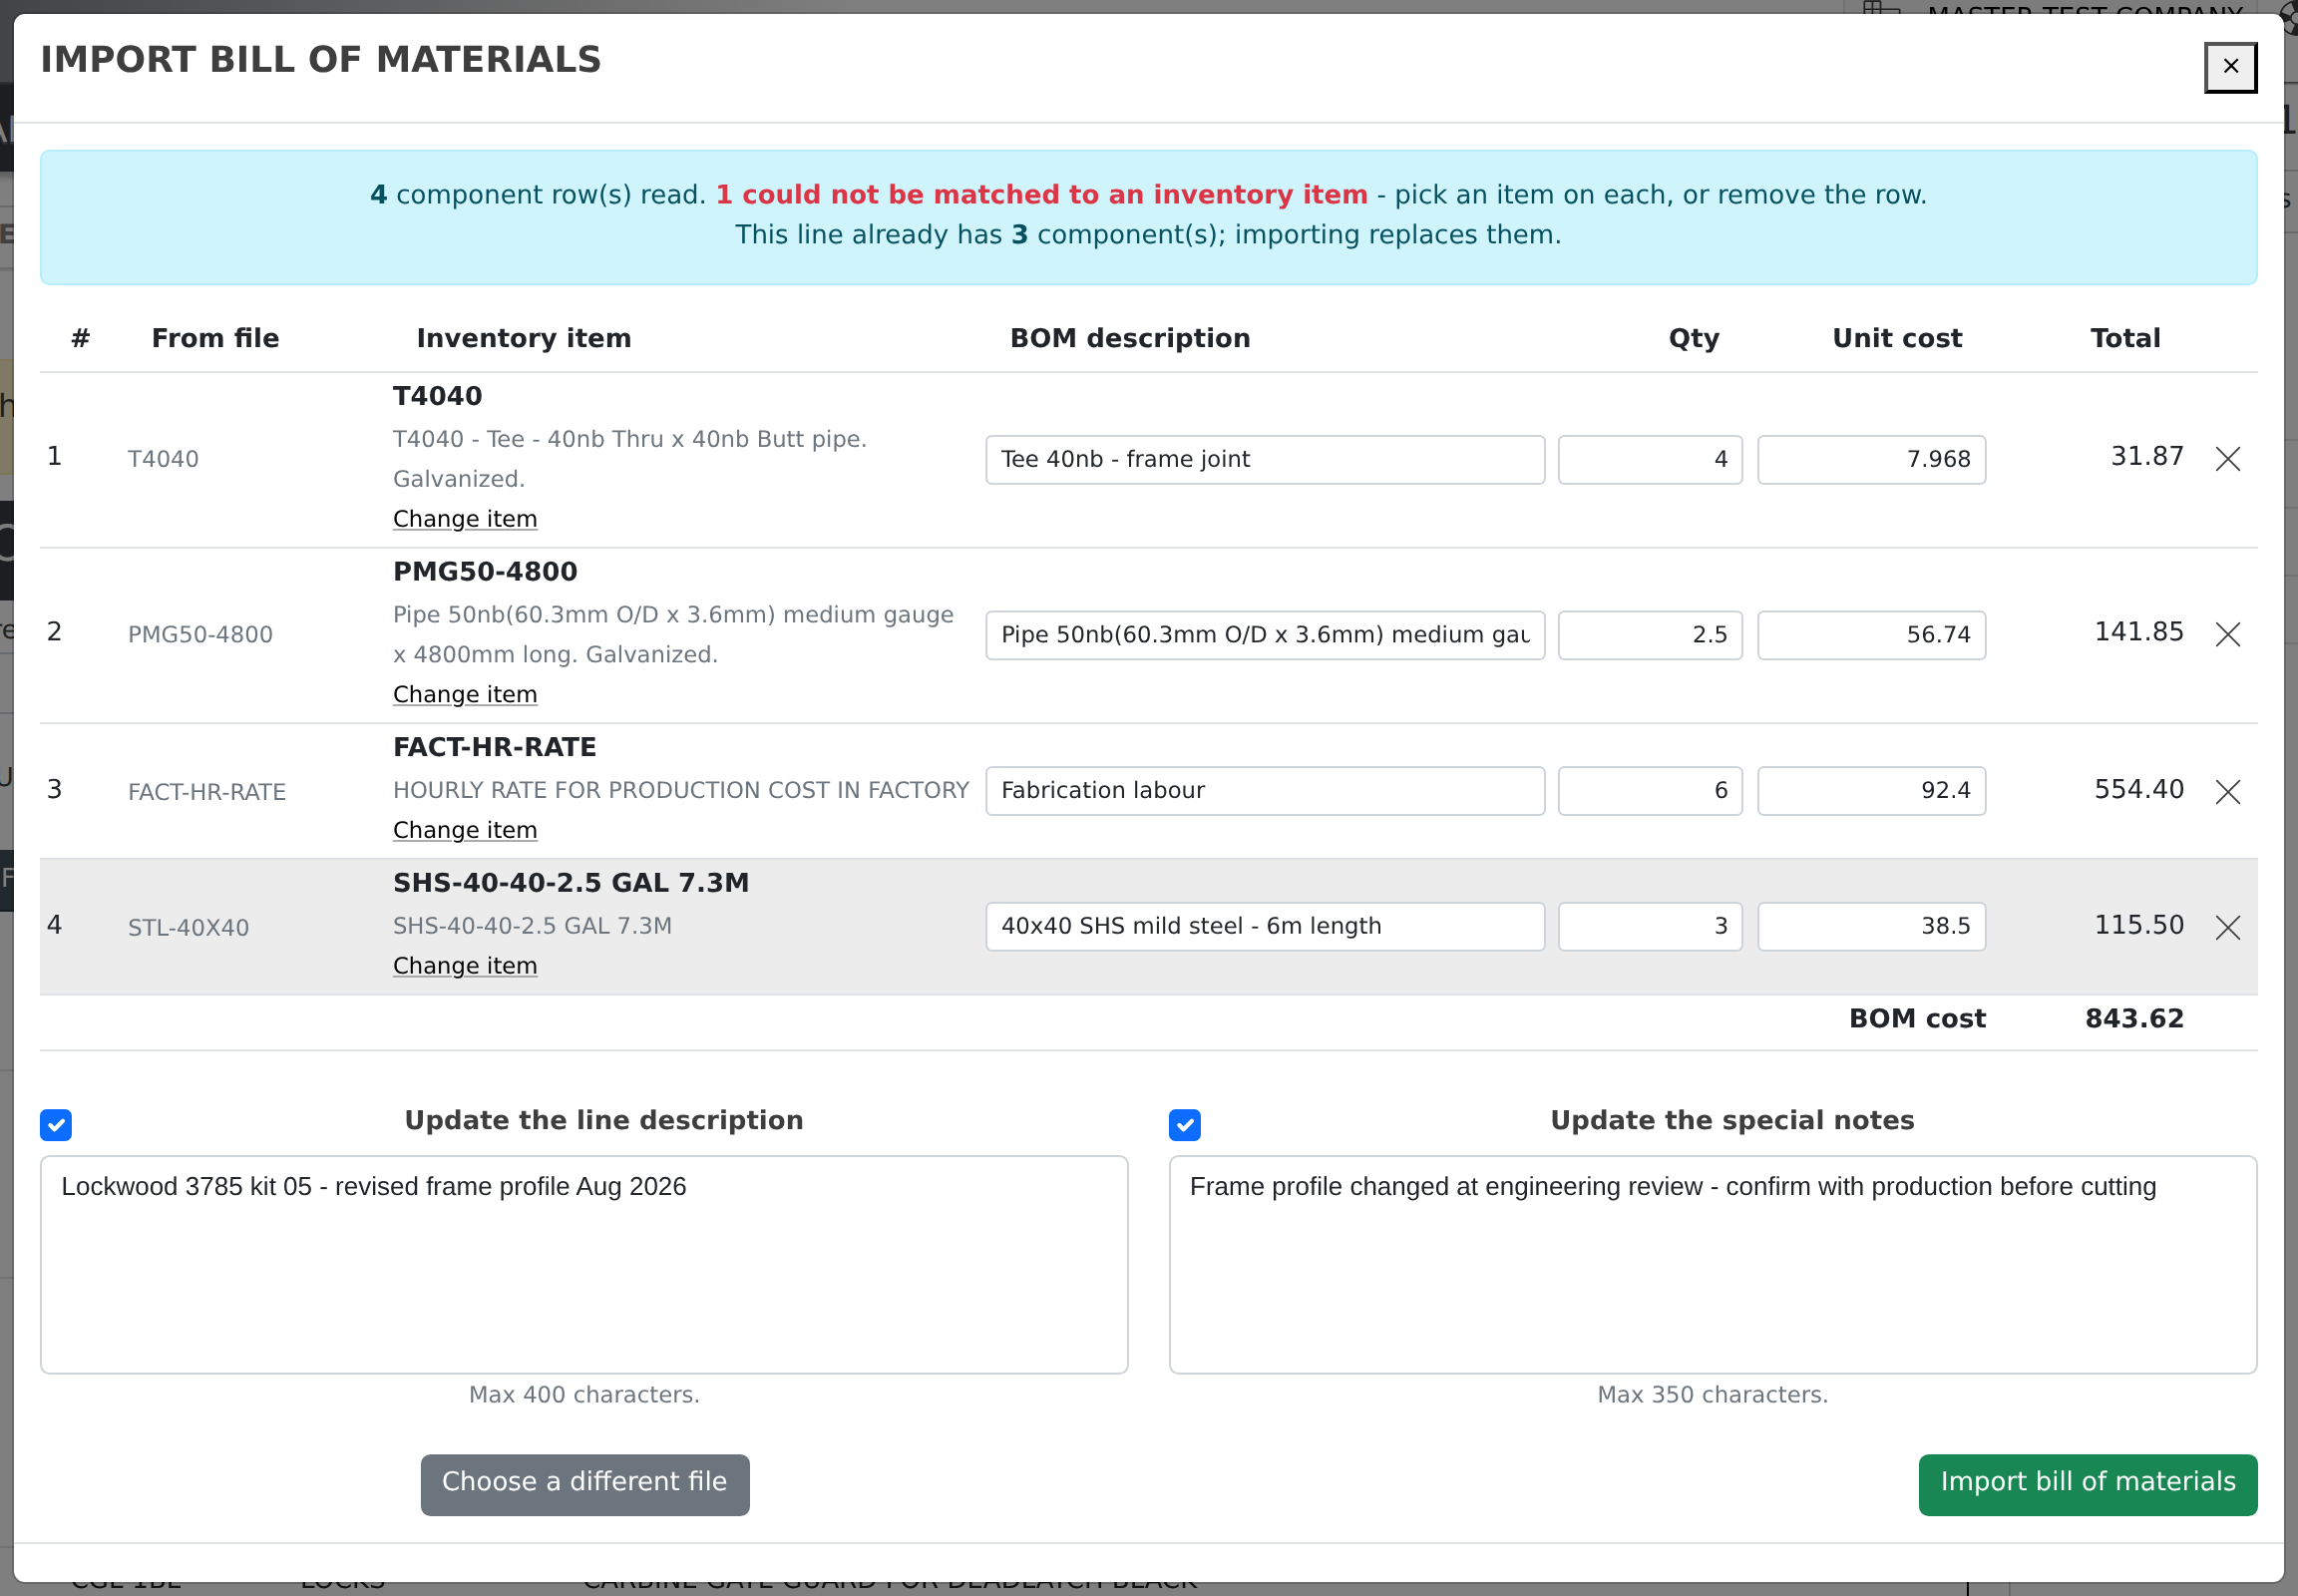
Each row shows what came out of the file and what it matched to:
- From file — the code or id as written in the CSV, so you can see what was searched for.
- Inventory item — the item the row was matched to. Rows that could not be matched are highlighted and given a search box so you can pick the right item yourself.
- BOM description, Qty, Unit cost — all editable before you import, so a small correction doesn’t mean editing the file and starting again.
- Total and the BOM cost at the foot — the value of the bill of materials as it stands, updating as you change quantities and costs.
A row you don’t want can be removed with the close button at the end of it.
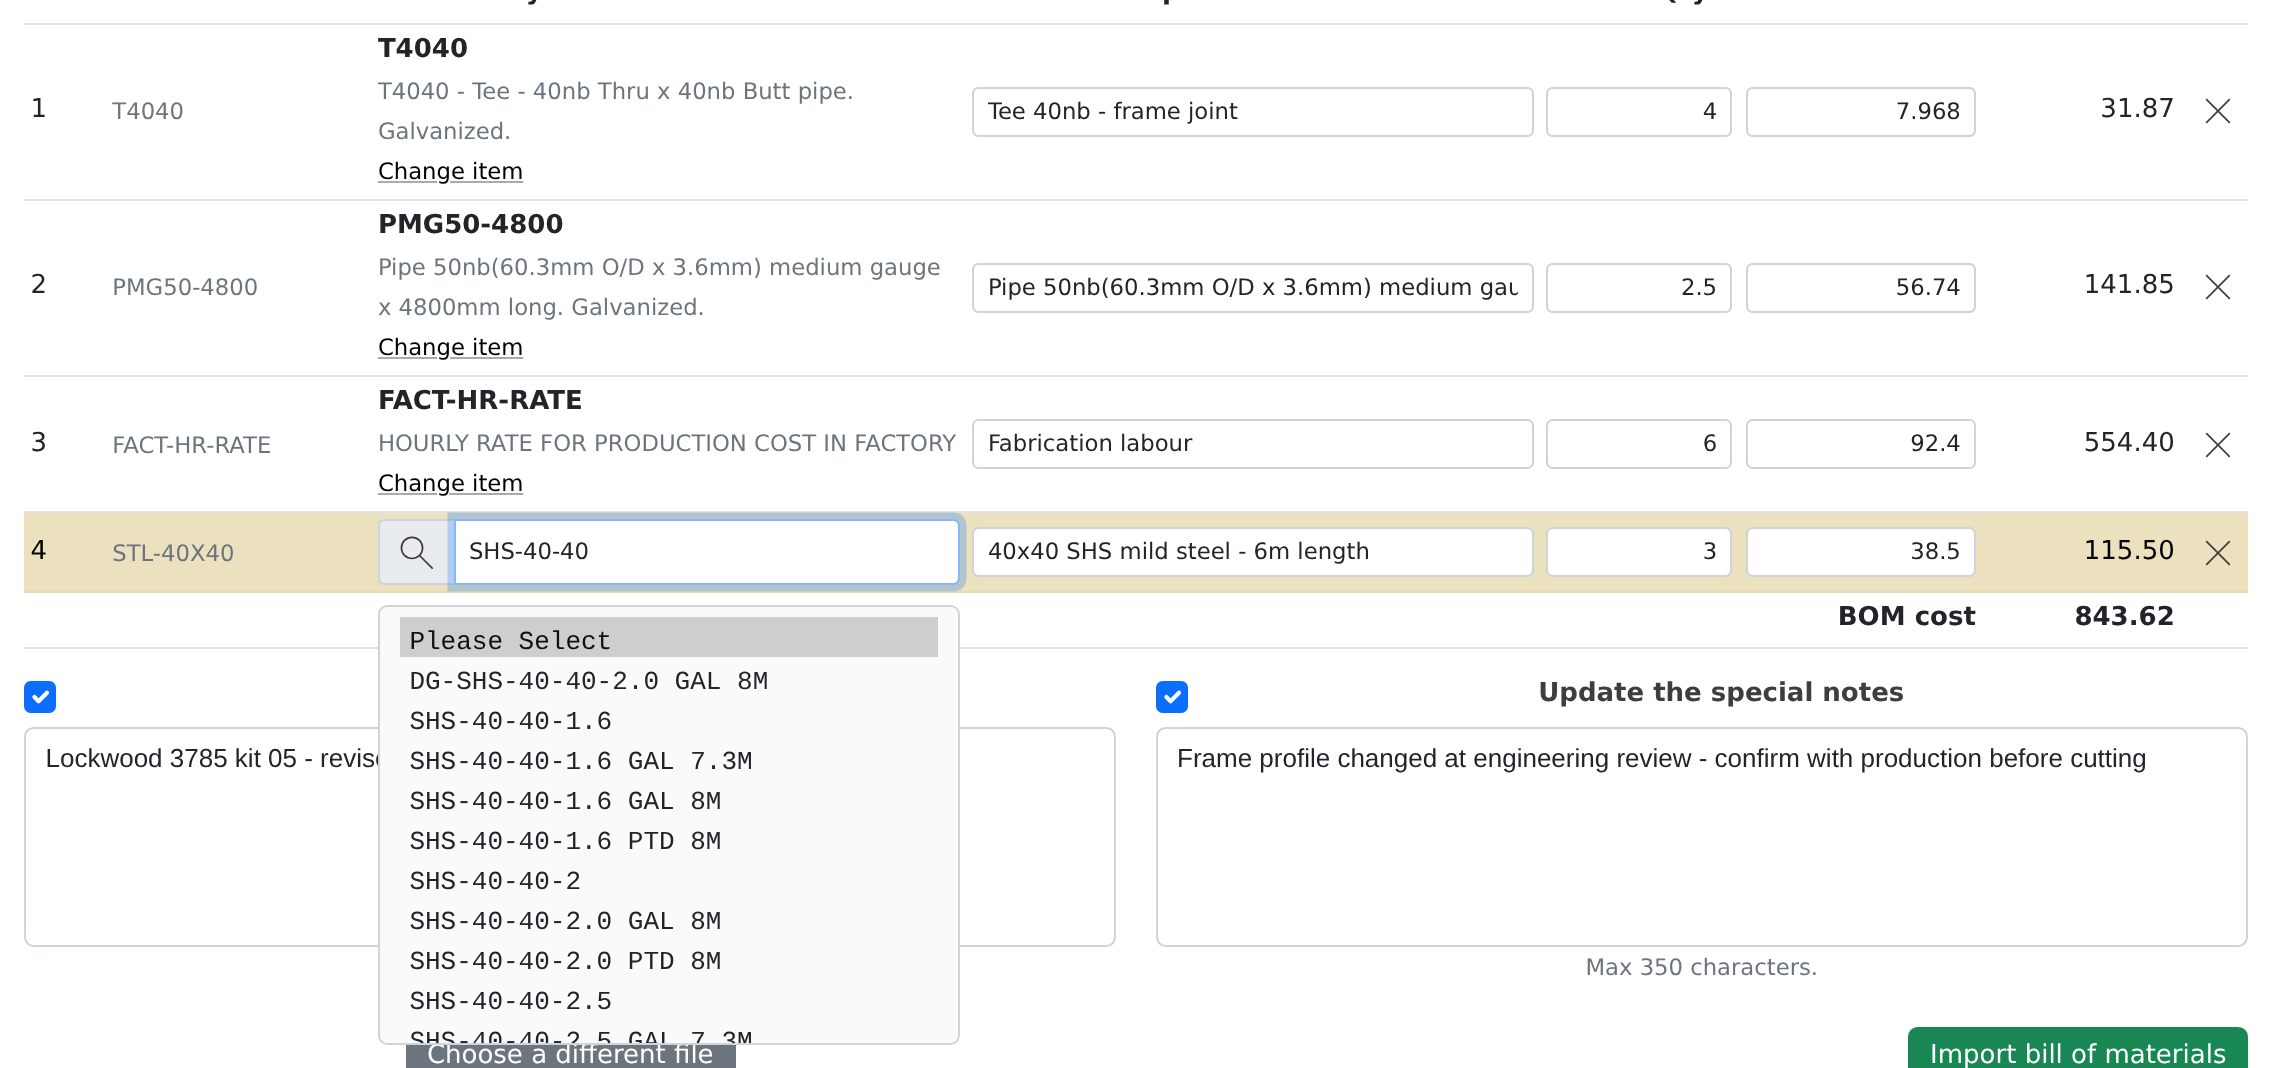
Updating the Project Line
Underneath the components are the project line’s own description and special notes. Each has a tick box, and unticked means untouched — the line keeps what it has.
If the file supplied new wording that differs from what the line currently holds, the box is ticked for you and the new wording is shown, ready to edit. Untick it if you would rather keep the existing wording.

Importing
- Resolve any highlighted rows, and remove anything you don’t want.
- Adjust descriptions, quantities and costs if you need to.
- Decide whether to update the line description and special notes.
- Click Import bill of materials and confirm.
The components are written to the project line as its bill of materials, the tick-boxed line fields are updated, and the Bill of Materials tab refreshes to show the new list. The import is recorded in the project’s history, along with any change to the line description or notes, so it is clear afterwards where the BOM came from.
Tips & Notes
- The import applies to this project line only. It does not change the inventory item’s standard bill of materials, or any other project.
-
Leave
costempty unless the external system is the authority on price — an empty cost picks up the item’s current cost at the moment you import. - Components imported this way behave like any other project BOM: they feed BOM Requisition, project costing and the manufacturing screens.
- If a code in your file is used by more than one inventory item, the importer will not guess — resolve it in the preview, or make the code unique in inventory.
- Importing twice simply replaces the BOM again; the previous list is superseded, not added to.
- Labour and other non-stock components import happily here, but the Advanced BOM Builder does not list them — if you later open an imported line in the Builder and save it, those rows are dropped. Re-import the file rather than editing such a line in the Builder.