
A process is a single manufacturing operation — for example Cut, Weld, Paint or Inspect. Each process carries its own costs, setup and timing information, and capacity. Once your processes are defined you assemble them into manufacturing routes that describe how a product is made.
Processes are the foundation of the manufacturing workflow, so it’s worth setting them up carefully — the cost, time and capacity values you enter here flow through to job costing and to the ETA/scheduling data on production and shopfloor orders.
Where to Find It
Manufacturing → Processes (the first step in the Manufacturing pipeline: Processes → Routes → Projects → Production Orders → Shopfloor Orders → Process Queues → Calendar).
This opens the Manufacturing Processes register, listing every process with its status, name, description, setup time and daily capacity. A warning in the Capacity column means no capacity has been set yet, so ETA data can’t be calculated for that process. Click the add_circle_outline (add) icon in the top-right to create a new process.
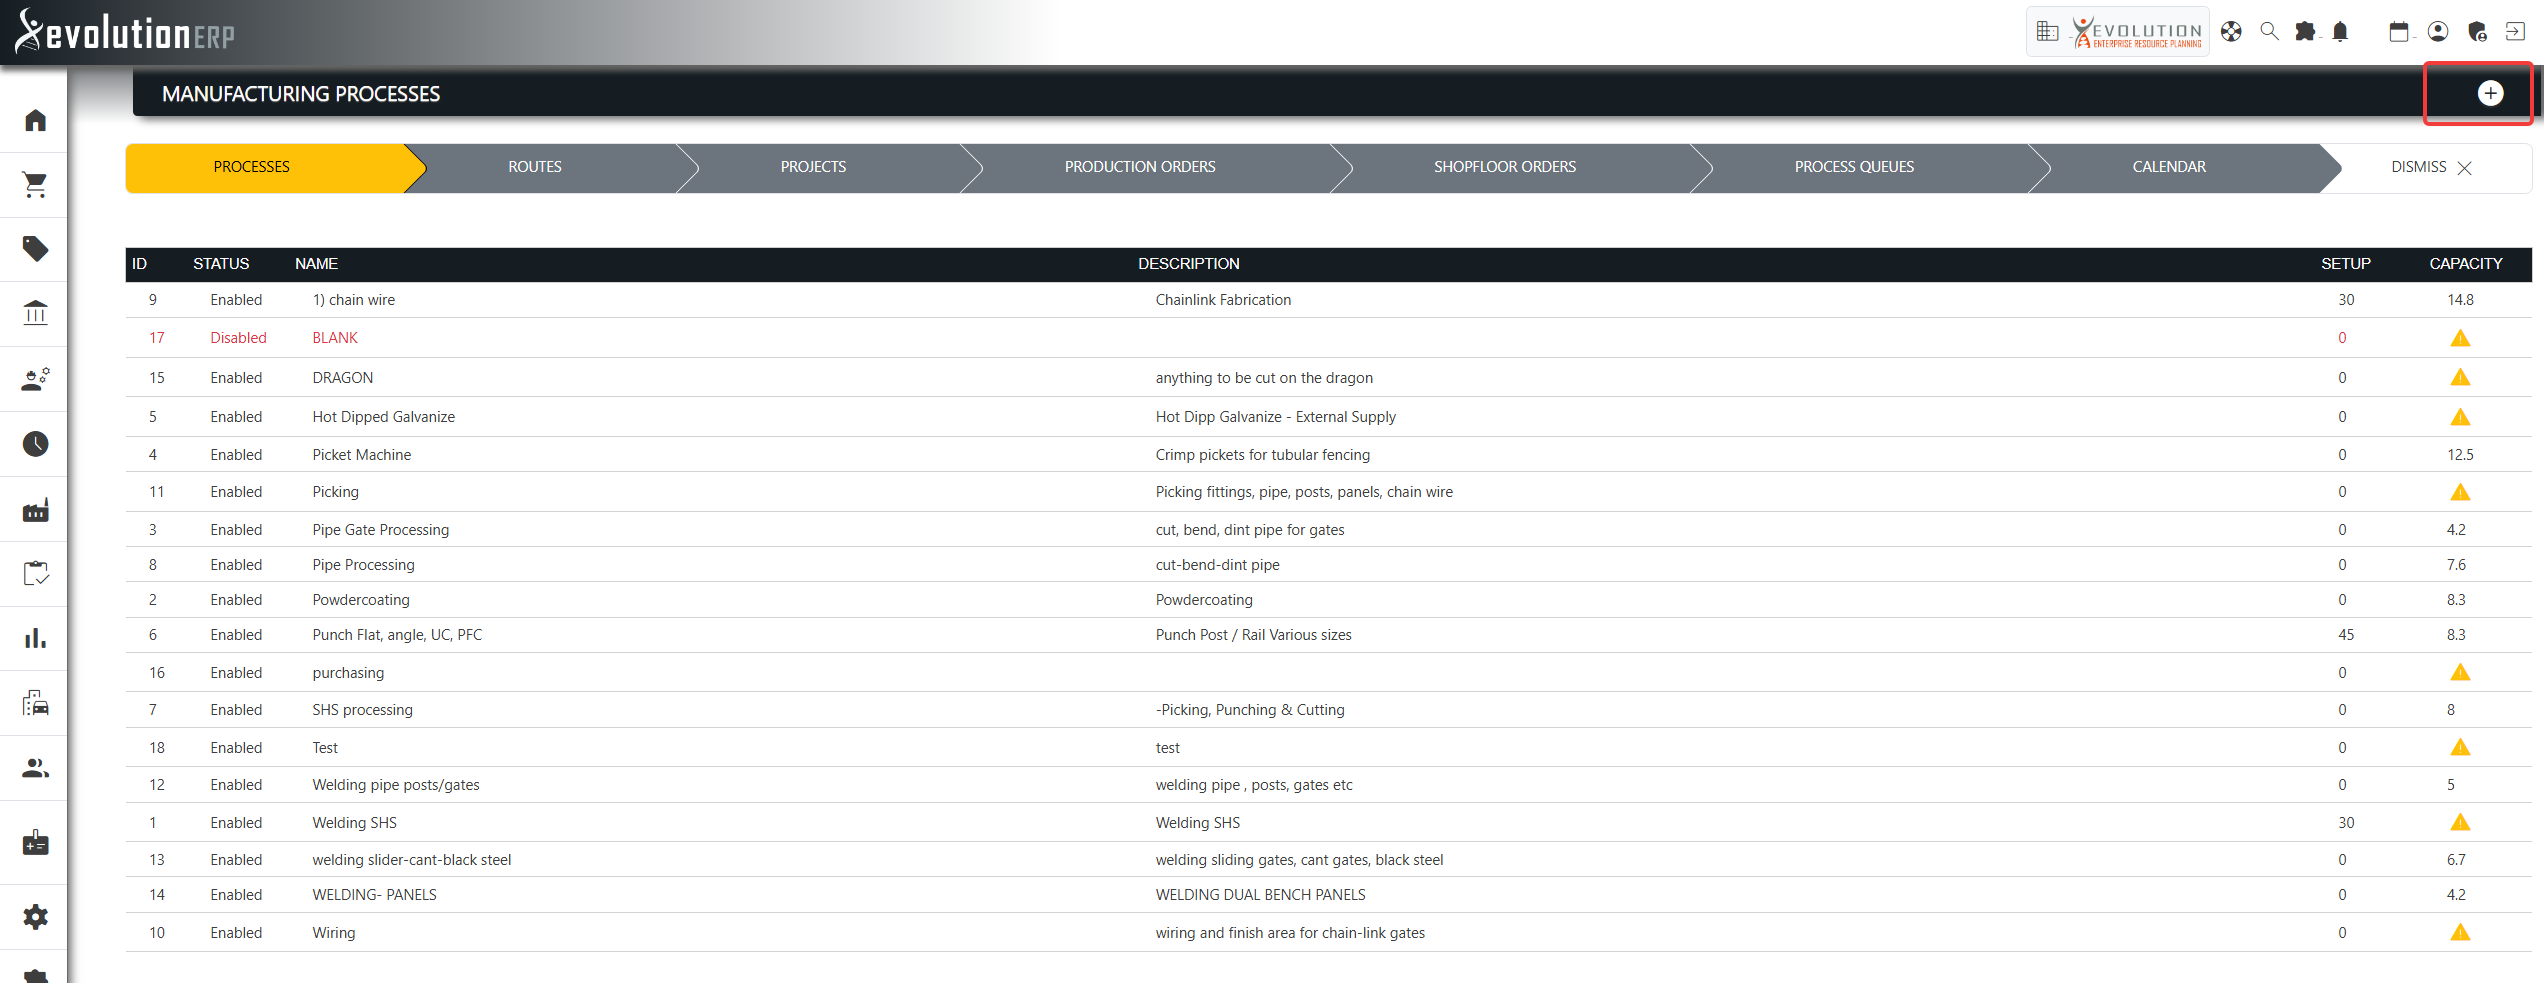
Step 1 — Create the Process
The add icon opens the New Manufacturing Process form. It captures the core details needed to create the process; the rest can be filled in on the edit screen afterwards.
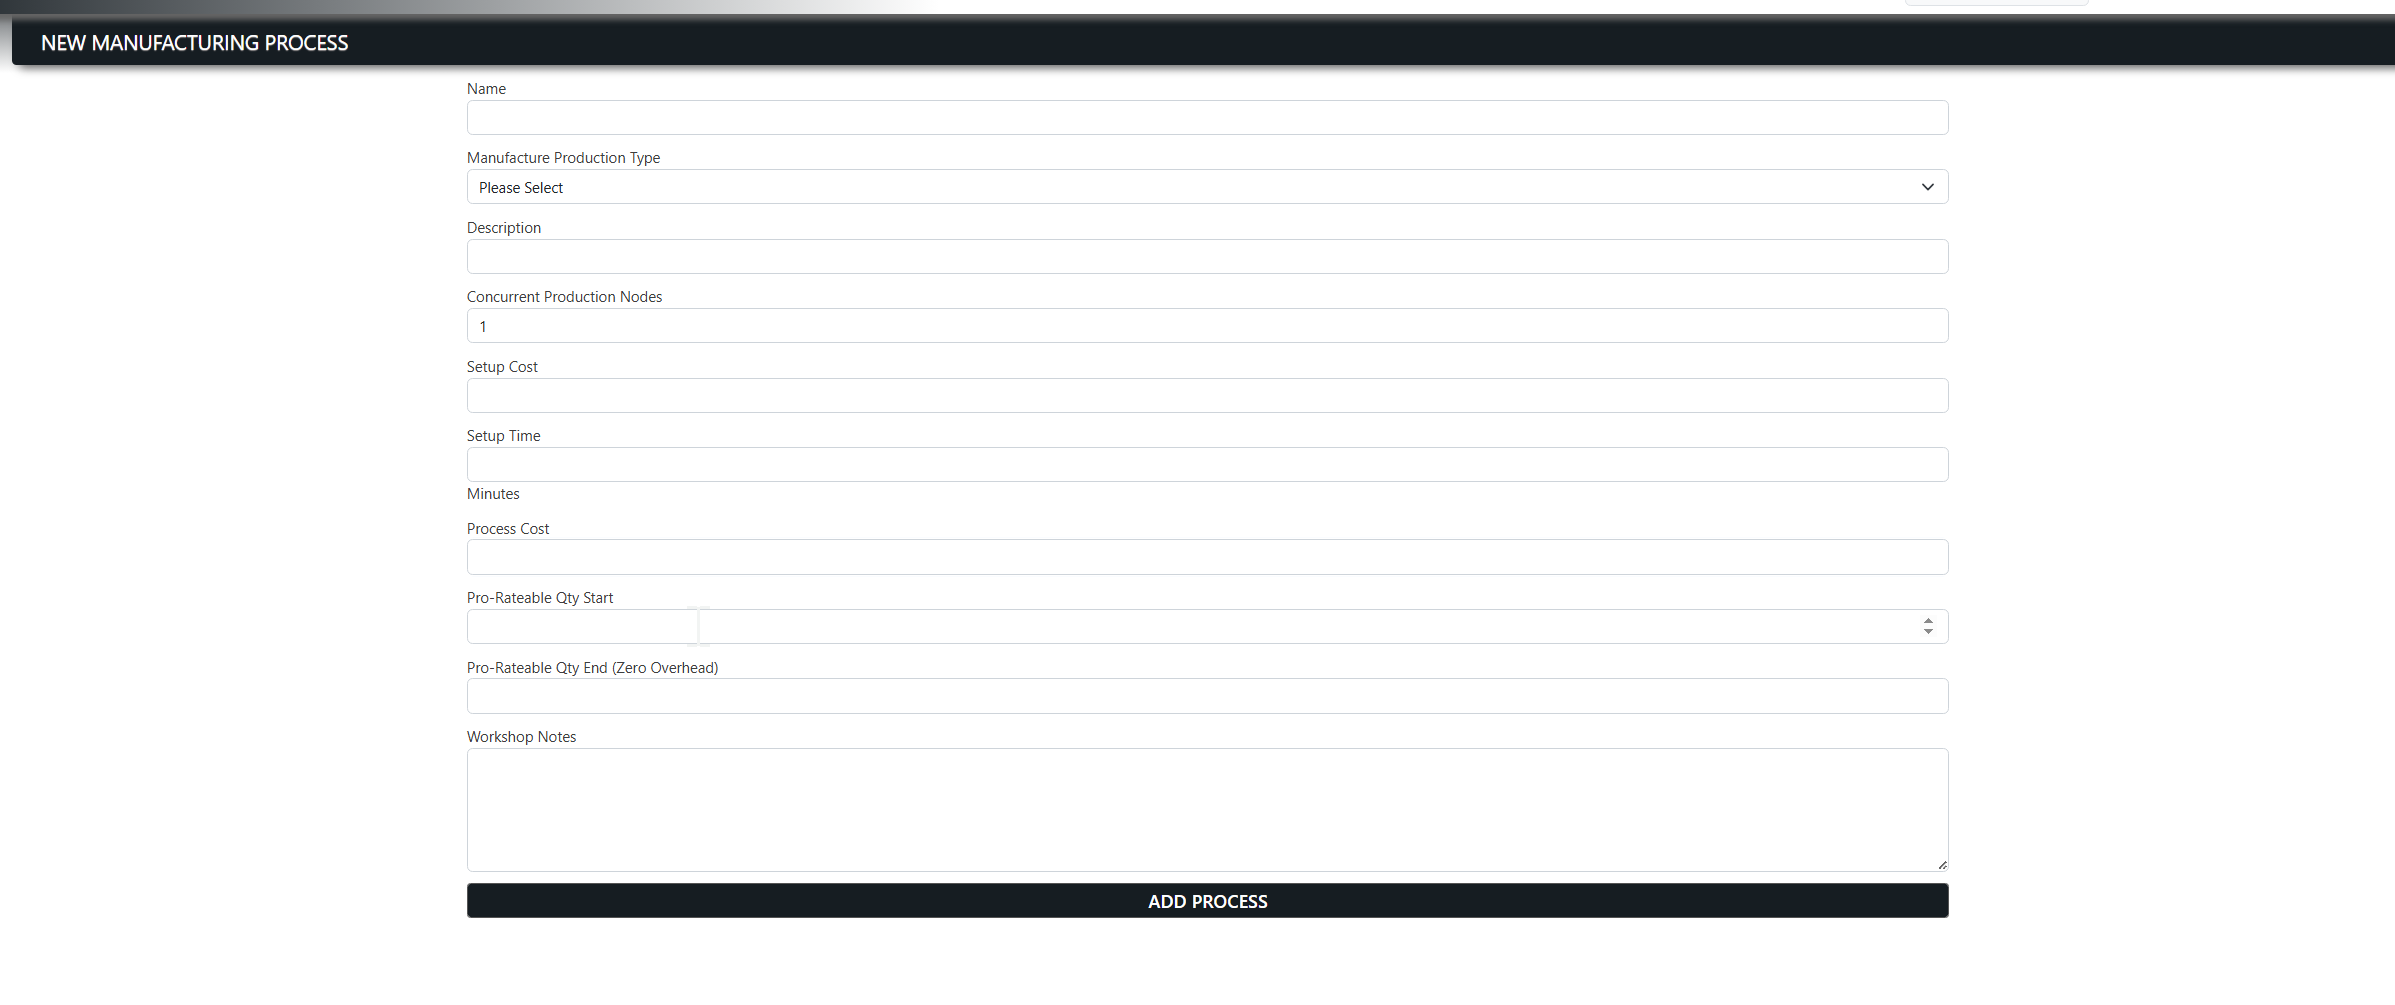
| Field | Required | What it does |
|---|---|---|
| Name | Yes | The name of the operation, e.g. Powder Coat. This is how the process appears in the register and in the route builder. |
| Manufacture Production Type | Yes |
Controls how staff are allowed to group items together when they pick this
process up on the factory floor tablets:
|
| Description | No | A short explanation of the operation. The register can be searched on this text. |
| Concurrent Production Nodes | No |
How many of this process can run at the same time (for example, the number of
machines or stations available). Defaults to 1. Used in capacity
and scheduling calculations.
|
| Setup Cost | No | A one-off cost applied each time the process is set up, independent of quantity. |
| Setup Time | No | The time, in minutes, to set up the process before production starts. |
| Process Cost | No | The running cost of the process (the per-unit/per-run cost used in job costing). |
| Pro-Rateable Qty Start | No | The quantity at which overhead begins to be pro-rated. Together with the end value below, this lets the setup overhead be spread across a production run rather than charged in full at every quantity. |
| Pro-Rateable Qty End (Zero Overhead) | No | The quantity at which the pro-rated overhead reaches zero — i.e. above this quantity no setup overhead is added per unit. |
| Workshop Notes | No | Free-text instructions for the shop floor about how to carry out the process. |
Click Add Process to save. The process appears in the register and opens for editing, where additional settings become available.
Step 2 — Additional Settings (Edit Process)
Clicking a process in the register opens the Manufacturing Process Edit screen. Alongside the fields above, the edit screen adds:
| Field | What it does |
|---|---|
| Status | Enabled makes the process available in the route builder; Disabled hides it without deleting it or its history. |
| External Contractor | Set to Yes when the process is performed by an outside contractor. This reveals the Lead Time for External Manufacture in Days field, used to allow for turnaround time in scheduling. |
| UOM | The unit of measure the process is counted in, chosen from your configured units. |
| AVG Daily Production in Minutes | The daily capacity of the process in minutes. This is what drives ETA and scheduling — a process with no capacity set shows the warning icon in the register. |
| Inventory Item Cost Takeup | An optional inventory item code to link the process to an item for costing purposes, so the process cost is taken up against that item. |
| QA Form Selection | Links workshop/QA forms to the process so the required checks can be captured when the process is performed. |
Click Save to apply your changes.
How Processes Are Used
Enabled processes appear in the route builder, where you drag them into the desired order to form a route (see Adding Manufacturing Routes). From there the cost, time and capacity defined on each process flow through to job costing and to the scheduling/ETA data on production and shopfloor orders.