
A manufacturing route is a named, reusable sequence of processes that describes how something is made — for example Cut → Weld → Paint → Inspect. Once a route is defined you can reuse it across projects and production orders instead of re-listing the steps every time.
Routes are built from the processes you’ve already set up, so make sure your processes exist first (Manufacturing → Processes). A route can also be arranged as a hierarchy, where some steps are children of an earlier step, to model sub-assemblies and parallel work.
Where to Find It
Manufacturing → Routes (the Routes step in the Manufacturing pipeline: Processes → Routes → Projects → Production Orders → Shopfloor Orders → Process Queues → Calendar).
This opens the Manufacturing Routing register, listing every route with its status, name and description. Click the add_circle_outline (add) icon in the top-right to create a new route.
Step 1 — Create the Route
The add icon opens the “Add new Route” window. It captures just the basics so you can get the route created:
| Field | What it does |
|---|---|
| Name | The name of the route, e.g. Standard Frame Build. This is how the route is identified in registers and when it’s applied to a project. |
| Description | An optional longer note describing what the route is for or when it should be used. The register can be searched on this text. |
Click Add Route to save. The route is created and you’re taken to the route editor, where you build the actual sequence of processes.
Step 2 — Build the Route from Processes
The Edit Manufacturing Route screen is where the route takes shape. On the left is the Processes list (every active process); on the right is the Route area.
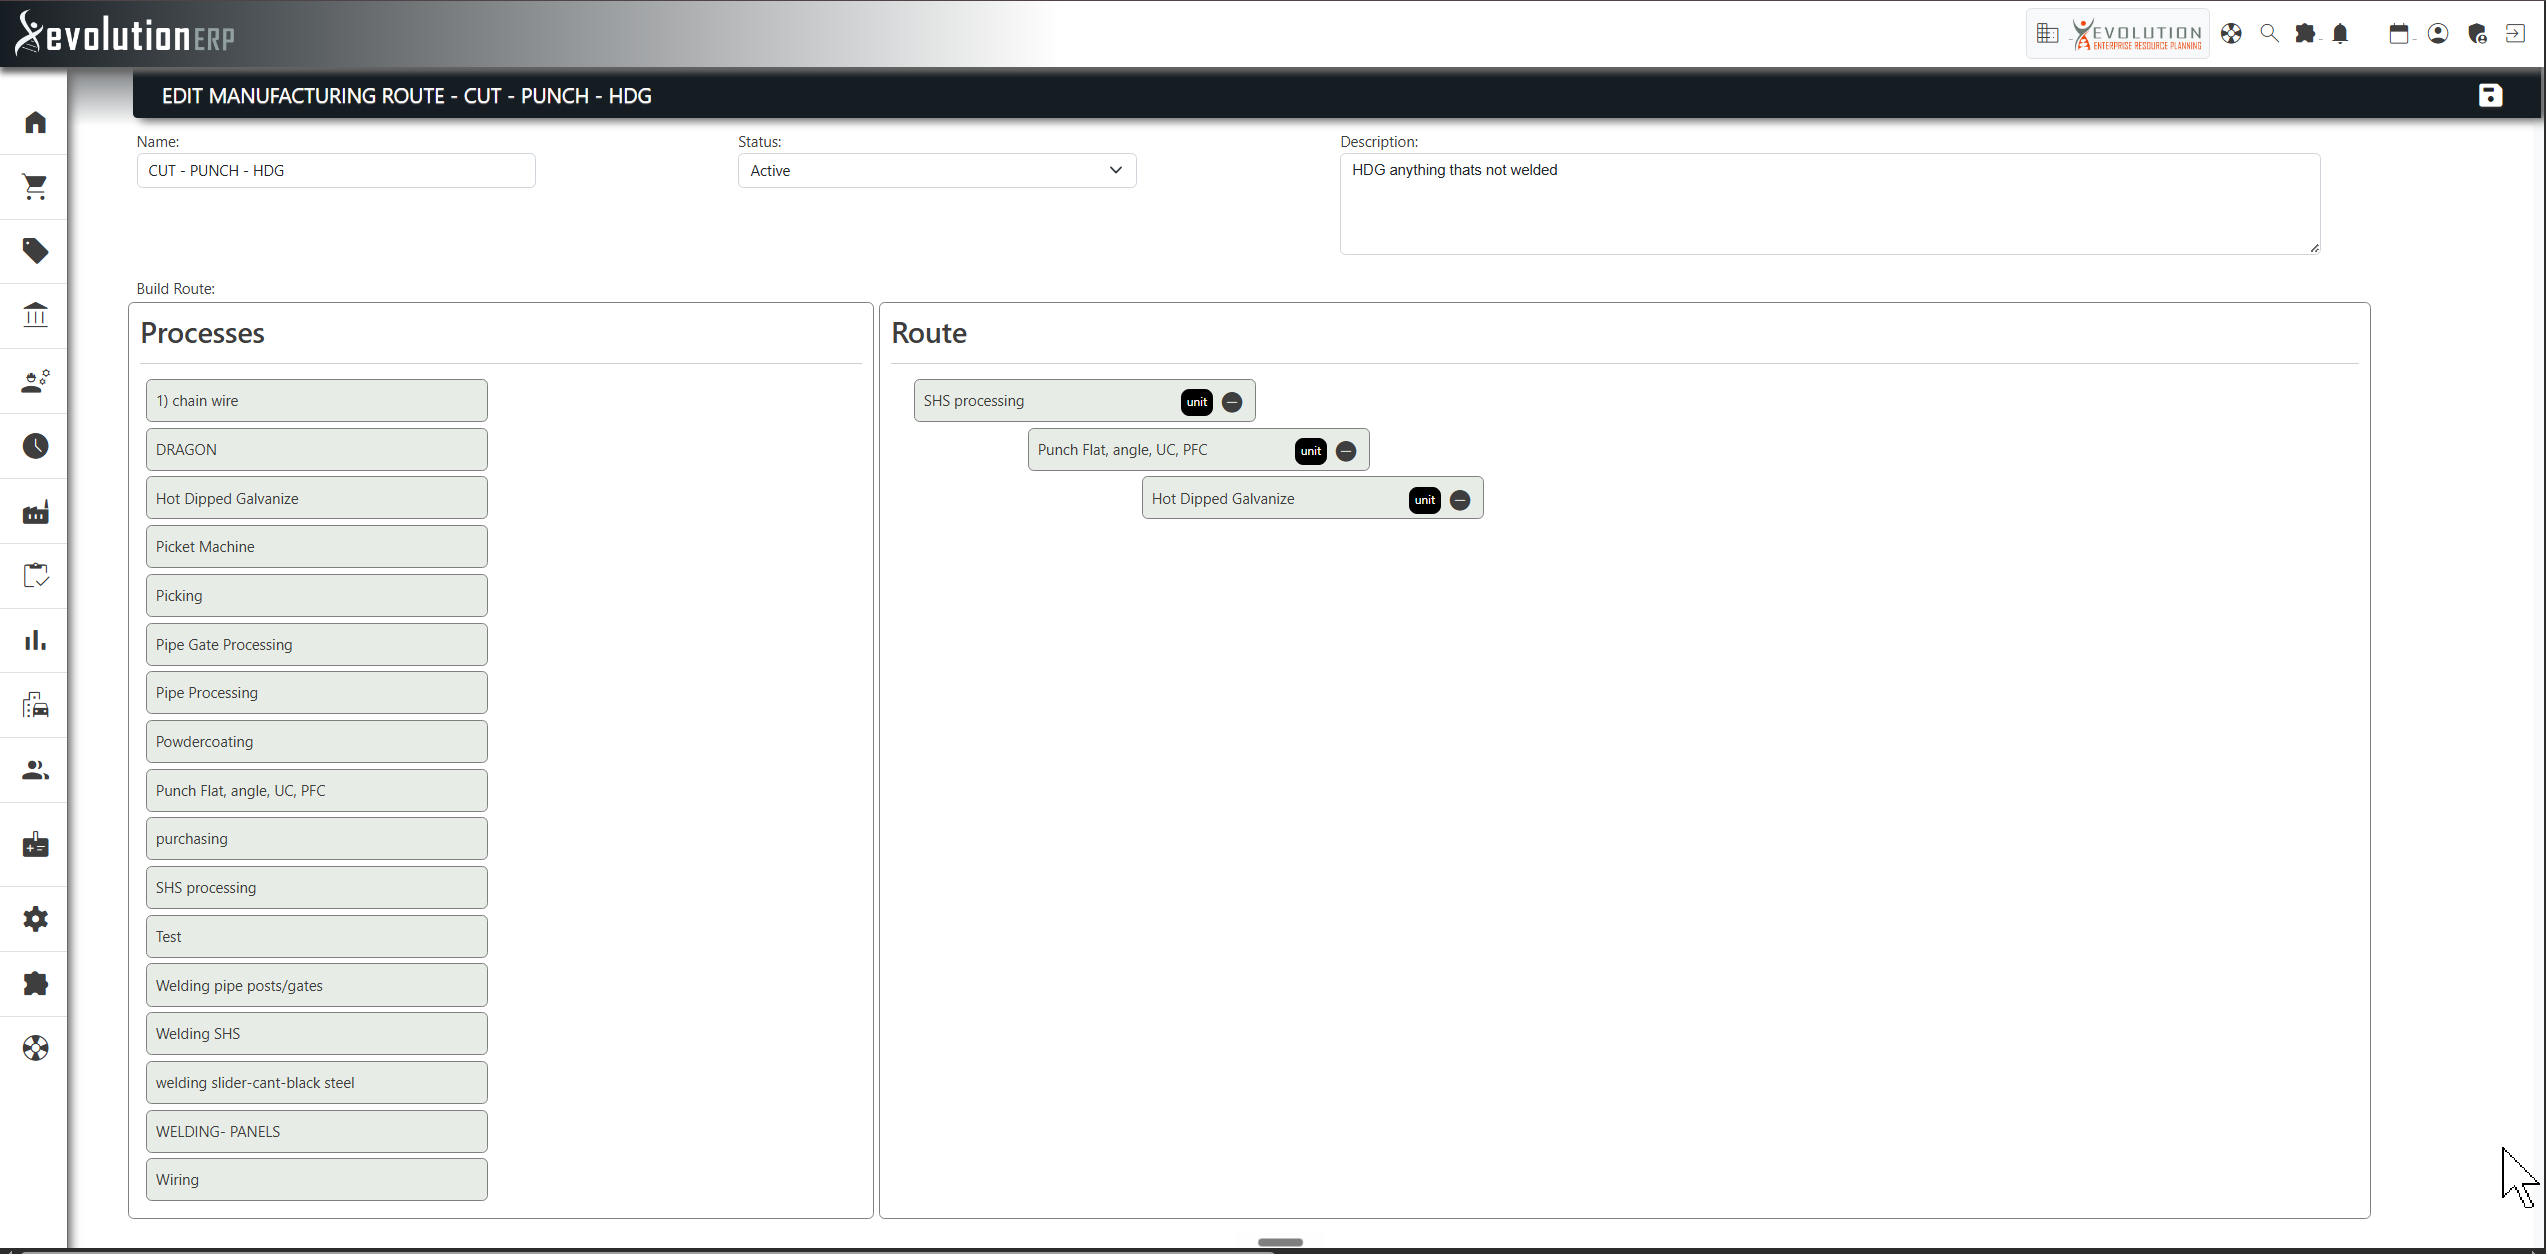
- Drag a process from the Processes list into the Route area to add it as a step.
- Reorder steps by dragging them up or down — the order is the order the work is carried out in.
- Indent a step (drag it to the right) to make it a child of the step above it. This builds the hierarchy used for sub-assemblies and grouped work.
- Remove a step with the remove_circle_outline icon on its row.
The editor also exposes a few route-level settings:
| Field | What it does |
|---|---|
| Name | The route name, editable here. |
| Status | Active makes the route available for use; Disabled hides it from selection without deleting it or its history. |
| Description | The longer description, editable here. |
| Build Route | The drag-and-drop work area described above — the ordered, indented list of processes that make up the route. |
| unit / batch toggle | If process types are enabled for your company, each step shows a small tag you can click to switch it between unit (the process runs once per item) and batch (the process runs once per batch). If the toggle isn’t shown, the feature isn’t enabled. |
When you’re happy with the sequence, click Save Changes (or the save icon in the header). Use Delete Route to remove it — an active route is disabled rather than permanently deleted to preserve history.
How Routes Are Used
Once saved and set to Active, a route becomes a reusable template for production. It defines the ordered steps that flow through to production orders, shopfloor orders and the process queues, so the shop floor knows exactly what work to perform and in what order. Because routes are reusable, the same standard build can be applied to many projects consistently.