
The CSV tools let you work on your inventory in a spreadsheet instead of item by item. Export what you want, edit it in Excel or Google Sheets, then import it back. Every import takes a backup first, so a bad file can be rolled back.
There are two tools that work as a pair: the Inventory CSV Data Exporter produces the file, and the CSV Inventory Updater / Importer reads it back in. A file exported from the first is already in the right shape for the second.
Where to Find It
Both tools live under Inventory → Tools:
- CSV Data Exporter — produces a CSV from your inventory.
- CSV Inventory Updater / Importer — reads a CSV back in, and restores backups.
Exporting Inventory
The exporter works in three steps.
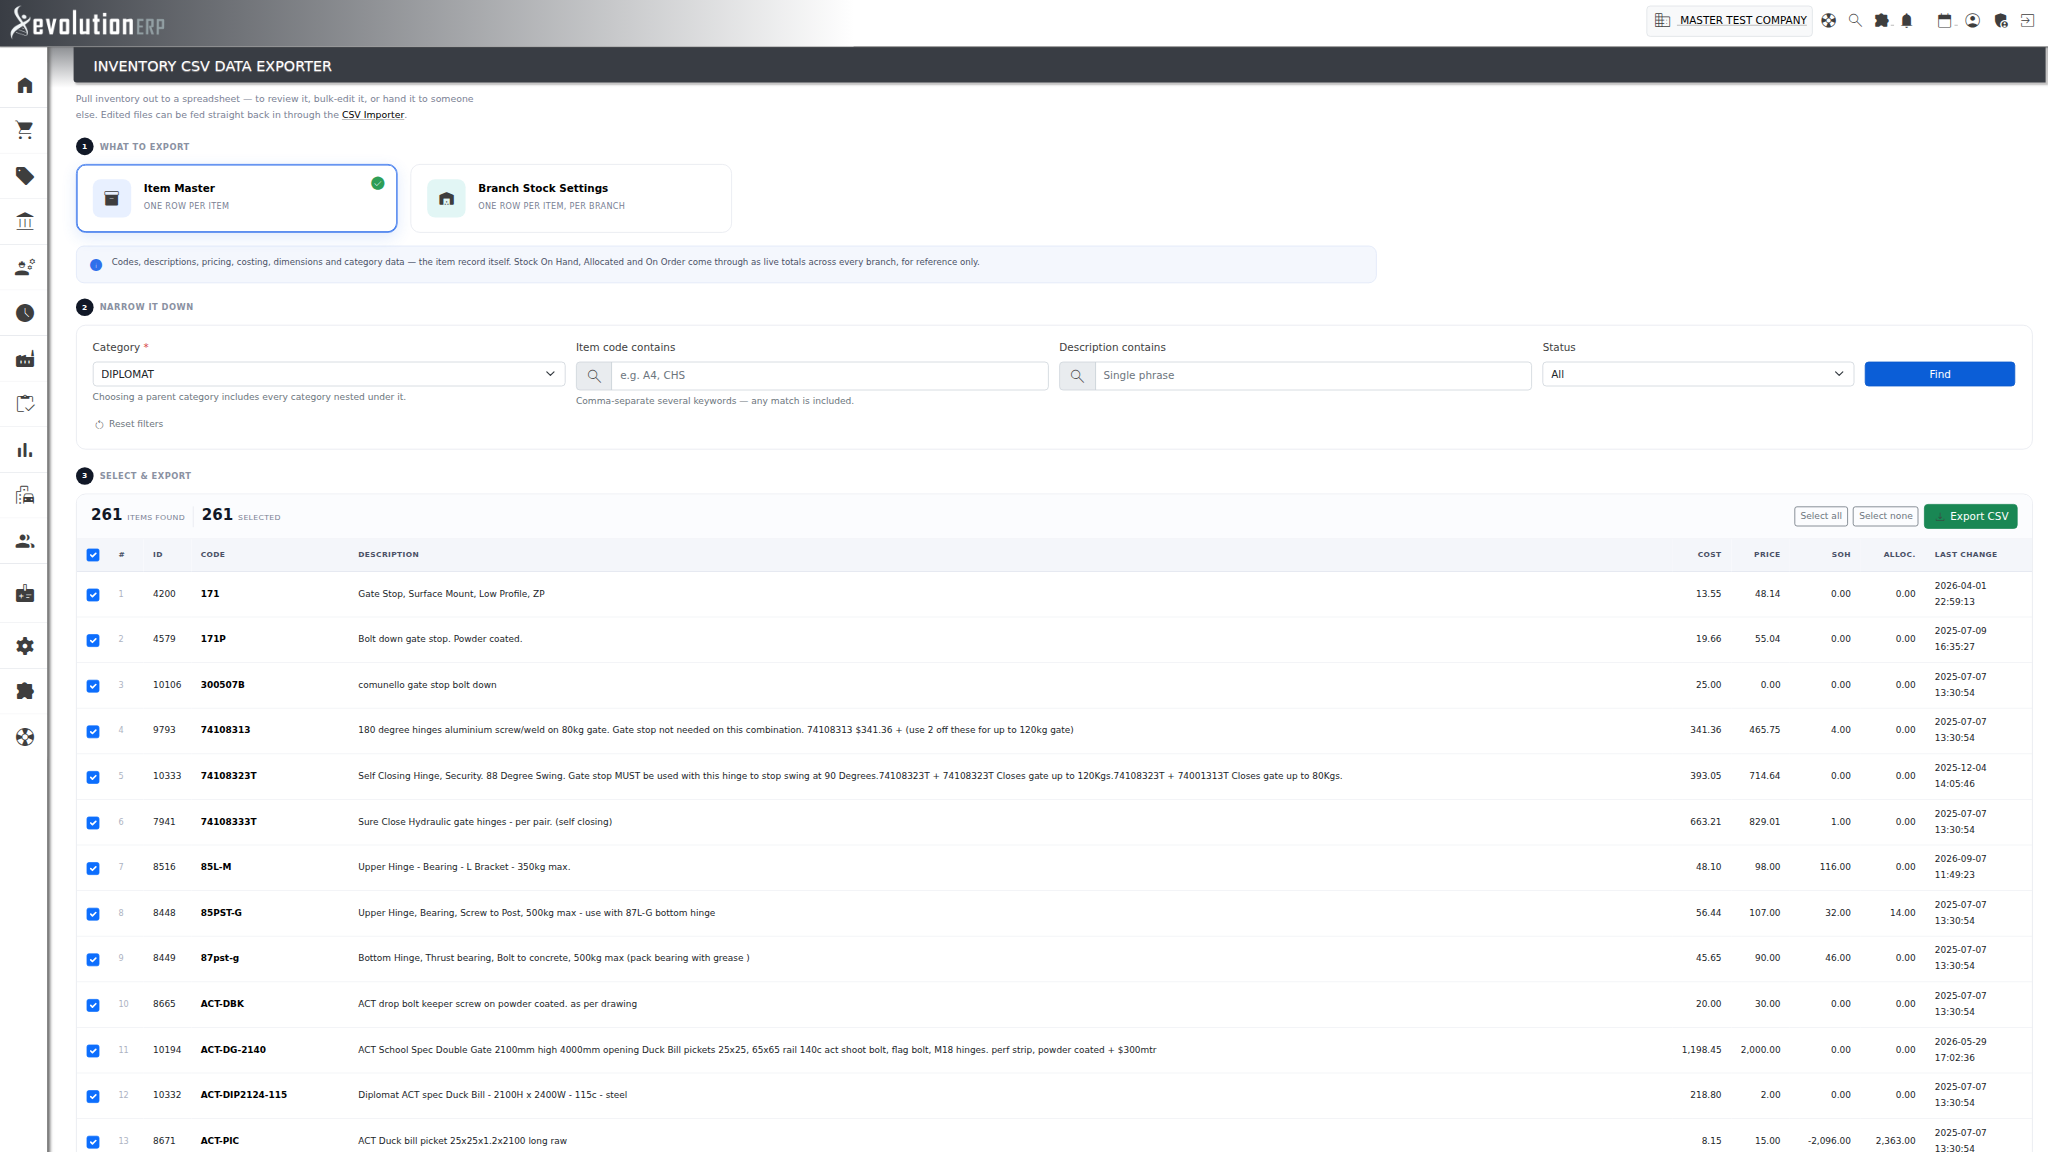
- Choose what to export. Item Master or Branch Stock Settings — see below. The choice changes the columns in the file.
- Narrow it down. A category is required. You can also filter on part of an item code, part of a description, and whether items are active. Multiple code keywords can be separated by commas, and an item matching any of them is included.
- Select the items. Every matching item is ticked by default. Untick anything you do not want, then choose Export CSV. The counters at the top of the list show how many items were found and how many are currently selected.
The Two Export Types
| Export type | Shape of the file | What it contains |
|---|---|---|
| Item Master | One row per item | The item record itself — code, description, pricing, costing, unit of measure, dimensions, category, product name and related fields. Stock On Hand, Allocated and On Order are included as live totals across every branch, for reference only. |
| Branch Stock Settings | One row per item, per branch | Min Bin, Max Bin and Bin Location for each branch, plus that branch's Stock On Hand, Allocated, On Order and Average Cost for reference. A branch filter lets you export a single branch instead of all of them. |
Category Filtering
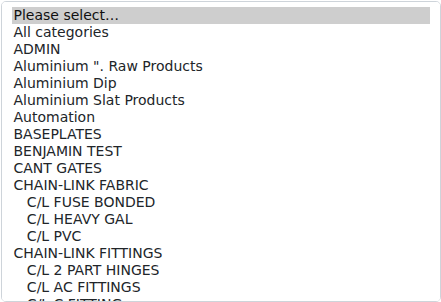
The category list is shown as a tree, with sub-categories indented beneath their parent. Choosing a parent category includes every category nested underneath it, at any depth — so picking a top-level group exports the whole group rather than only the handful of items filed directly against the parent itself.
Choose All categories to skip category filtering altogether.
Branch Stock Settings
Min and max bins, and bin locations, are held per branch — each branch can carry its own re-order levels for the same item. That is why they have their own export type and their own file, rather than sitting on the one-row-per-item Item Master file.
| Column | Editable | Notes |
|---|---|---|
id / code | Key | Identifies the item. Either will do. |
branch id / branch | Key | Identifies the branch. Either will do. |
min bin | Yes | The level at which the item should be re-ordered for that branch. |
max bin | Yes | The level the re-order tools top the item back up to. |
bin location | Yes | The bin code. Matched within that branch, so the same code can exist in more than one branch. |
soh, allocated, onorder, avg cost |
No | Included for reference. These are calculated — see Fields You Cannot Import. |
A blank cell means leave the existing value alone. Fill in only the branches and columns you want to change.
Importing a File
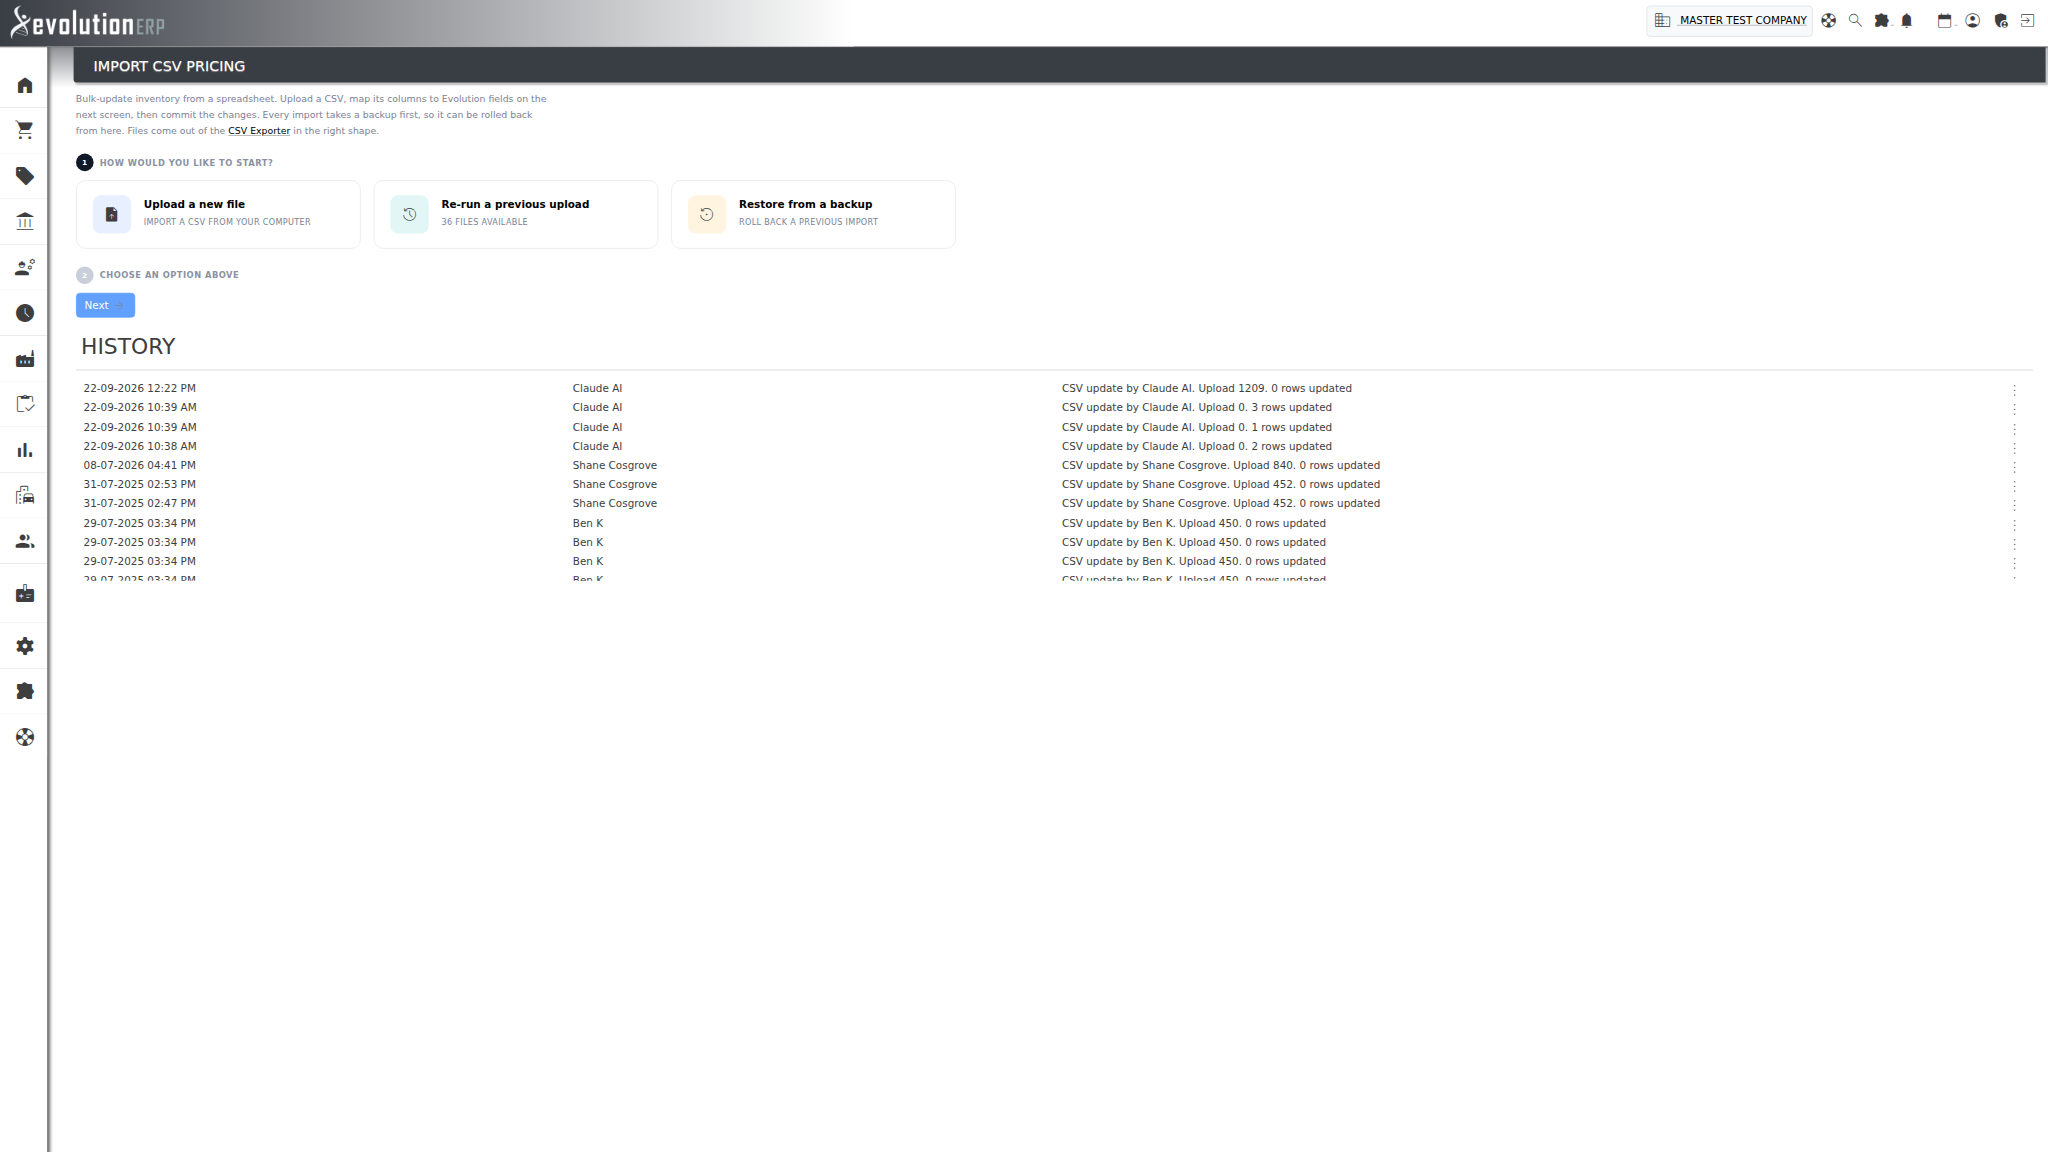
The importer opens on a choice of three ways to start.
| Option | What it does |
|---|---|
| Upload a new file | Pick a CSV from your computer and give it a name so you can find it again. The first row must be a header row. A blank template is available from the Download template button. |
| Re-run a previous upload | Every file you have uploaded is kept. Pick one from the list to map and run it again — useful for a regular supplier price list, or to re-apply a file against a different target. |
| Restore from a backup | Roll an import back. See Backups & Restoring. |
These are alternatives — choose one, and the screen shows only what that option needs.
Matching Your Columns
Once a file is chosen, the next screen shows its contents with a dropdown above each column. Use those dropdowns to tell Evolution which field each column holds. Where a column heading already matches a field name, it is matched for you.
A big file is shown as a preview rather than in full — see Large Files for what that changes.
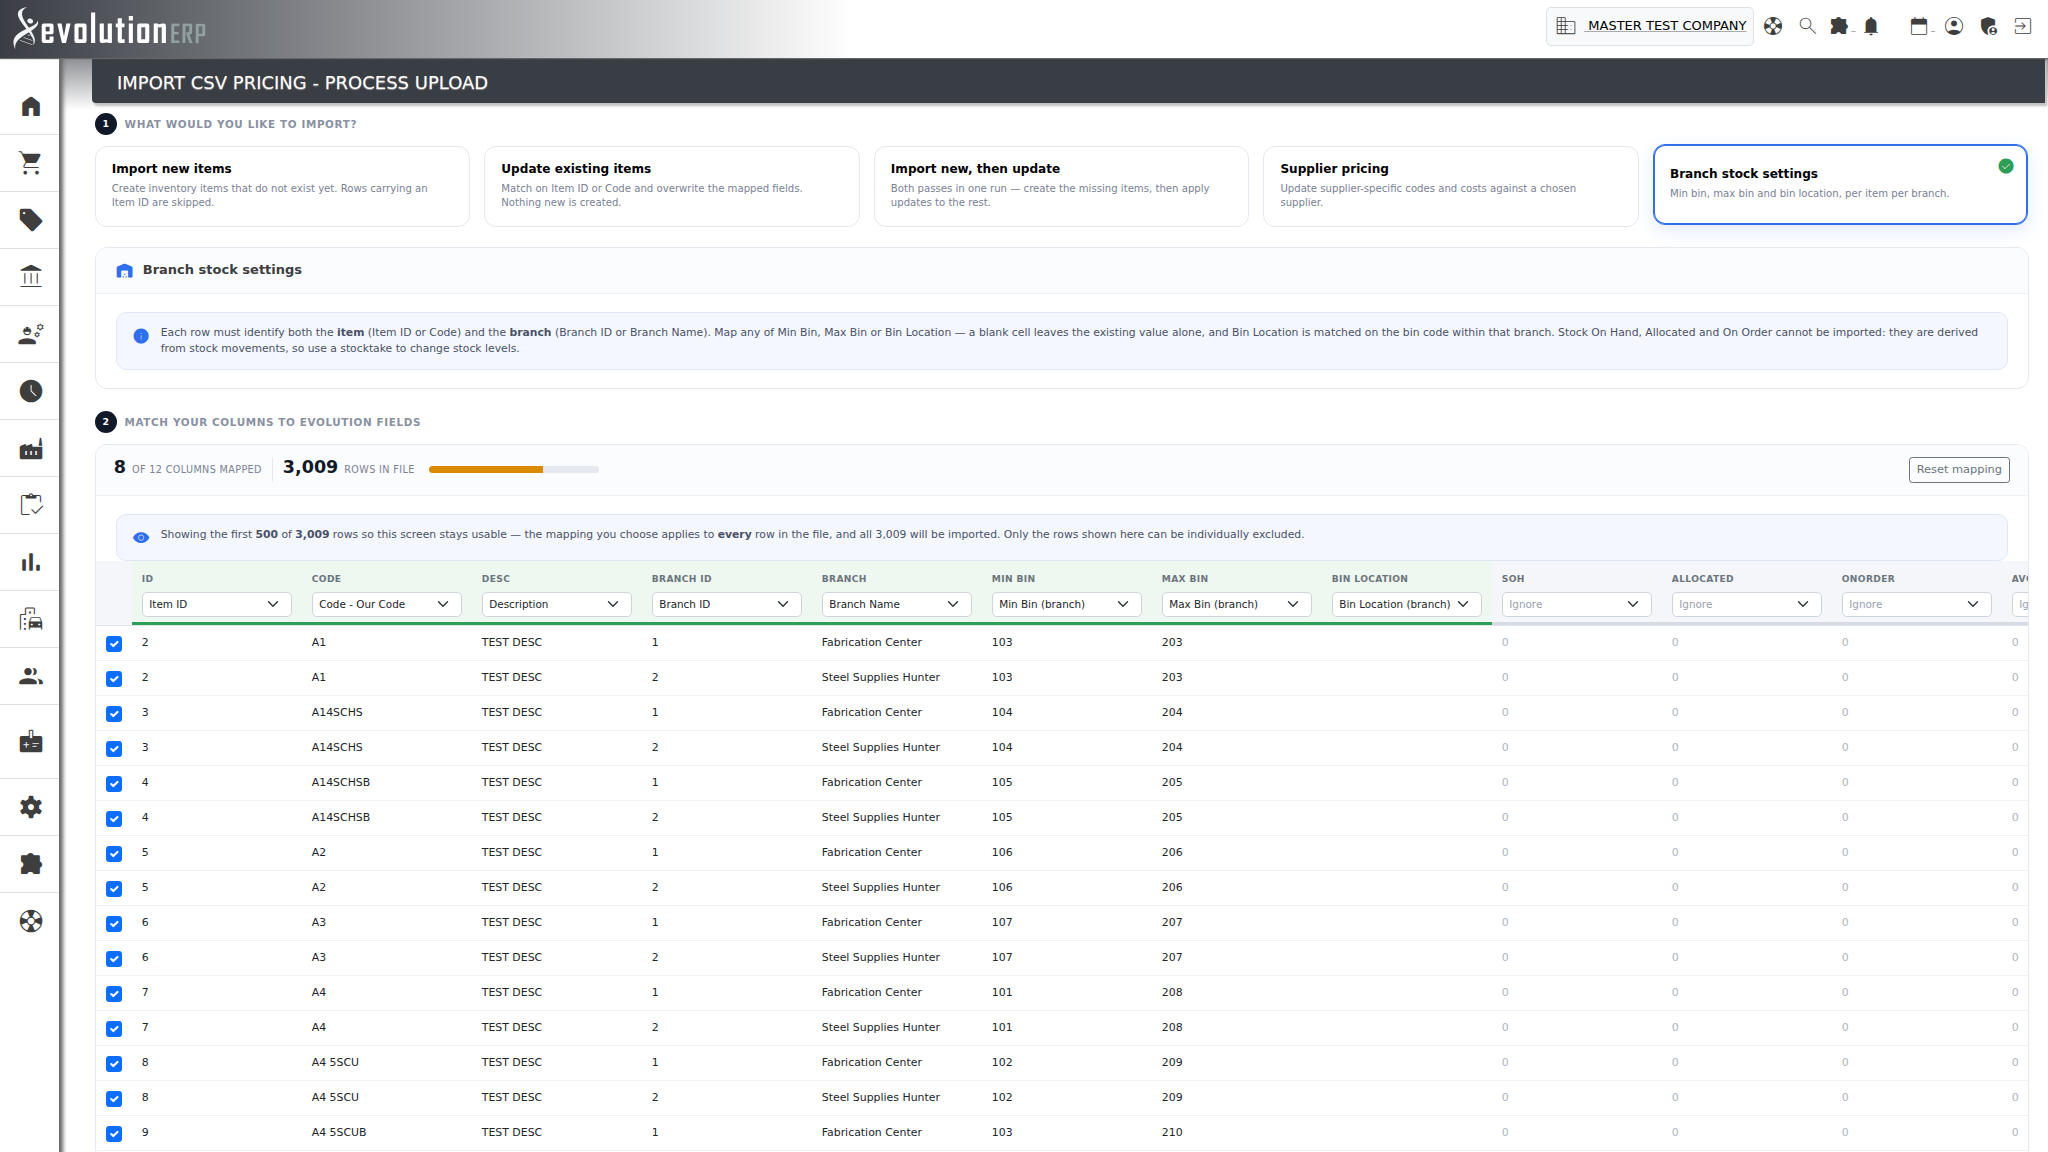
- Columns you map are highlighted, and the progress bar shows how much of the file will be used.
- Columns left on Ignore are greyed out and are not written.
- A field can only be mapped once.
- Untick any row shown to leave it out of the import.
The available fields change with the import target, so choose what you are importing first — the column list is filtered to the fields that target can actually write.
Large Files
A whole-catalogue file can run to tens of thousands of rows — a Branch Stock Settings export is one row per item per branch, so it multiplies quickly. Files that size import normally; the mapping screen just does not try to draw all of them at once.
- The table shows the first 500 rows as a preview. The counter above it always reports the real number of rows in the file.
- The mapping you choose applies to every row in the file, and the whole file is imported — not just the rows you can see.
- Because only the previewed rows are on screen, only those rows can be individually unticked. The select-all box is hidden for that reason, so it cannot look as though it excludes rows it has no way of reaching.
While a long import runs, the screen reports its progress a few hundred rows at a time. Leave the page open until the report appears.
If the import will not start
The importer refuses rather than guessing, and tells you why. In every one of these cases nothing is written and your data is unchanged:
| What it says | What to do |
|---|---|
| The uploaded file has changed since you mapped its columns | The file was replaced between choosing it and running the import, so the columns you matched may no longer be in the same places. Open the file again from the importer and re-map it. |
| The form did not describe the file the server is holding | Usually the same cause, or a stale browser tab left open from an earlier session. Go back to the importer and start the file again. |
| That form was too large… / arrived incomplete | The request did not reach the server in one piece. Try again, and if it keeps happening send the message to support — it names the server setting involved. |
What You Can Import
| Target | What it does |
|---|---|
| Import new items | Creates inventory items that do not exist yet. Rows that carry an Item ID are skipped. |
| Update existing items | Matches on Item ID or Code and overwrites the mapped fields. Nothing new is created. |
| Import new, then update | Both passes in one run — create the missing items, then apply updates to the rest. |
| Supplier pricing | Updates supplier-specific codes and costs against a supplier you choose. When using this target, the column you map as Category ID must hold the supplier's item code for that row. |
| Branch stock settings | Min bin, max bin and bin location, per item per branch. Each row must identify both the item (Item ID or Code) and the branch (Branch ID or Branch Name), plus at least one value to write. |
The Import Report
When the run finishes you get a report of what happened, row by row, with a link back into each item it touched.
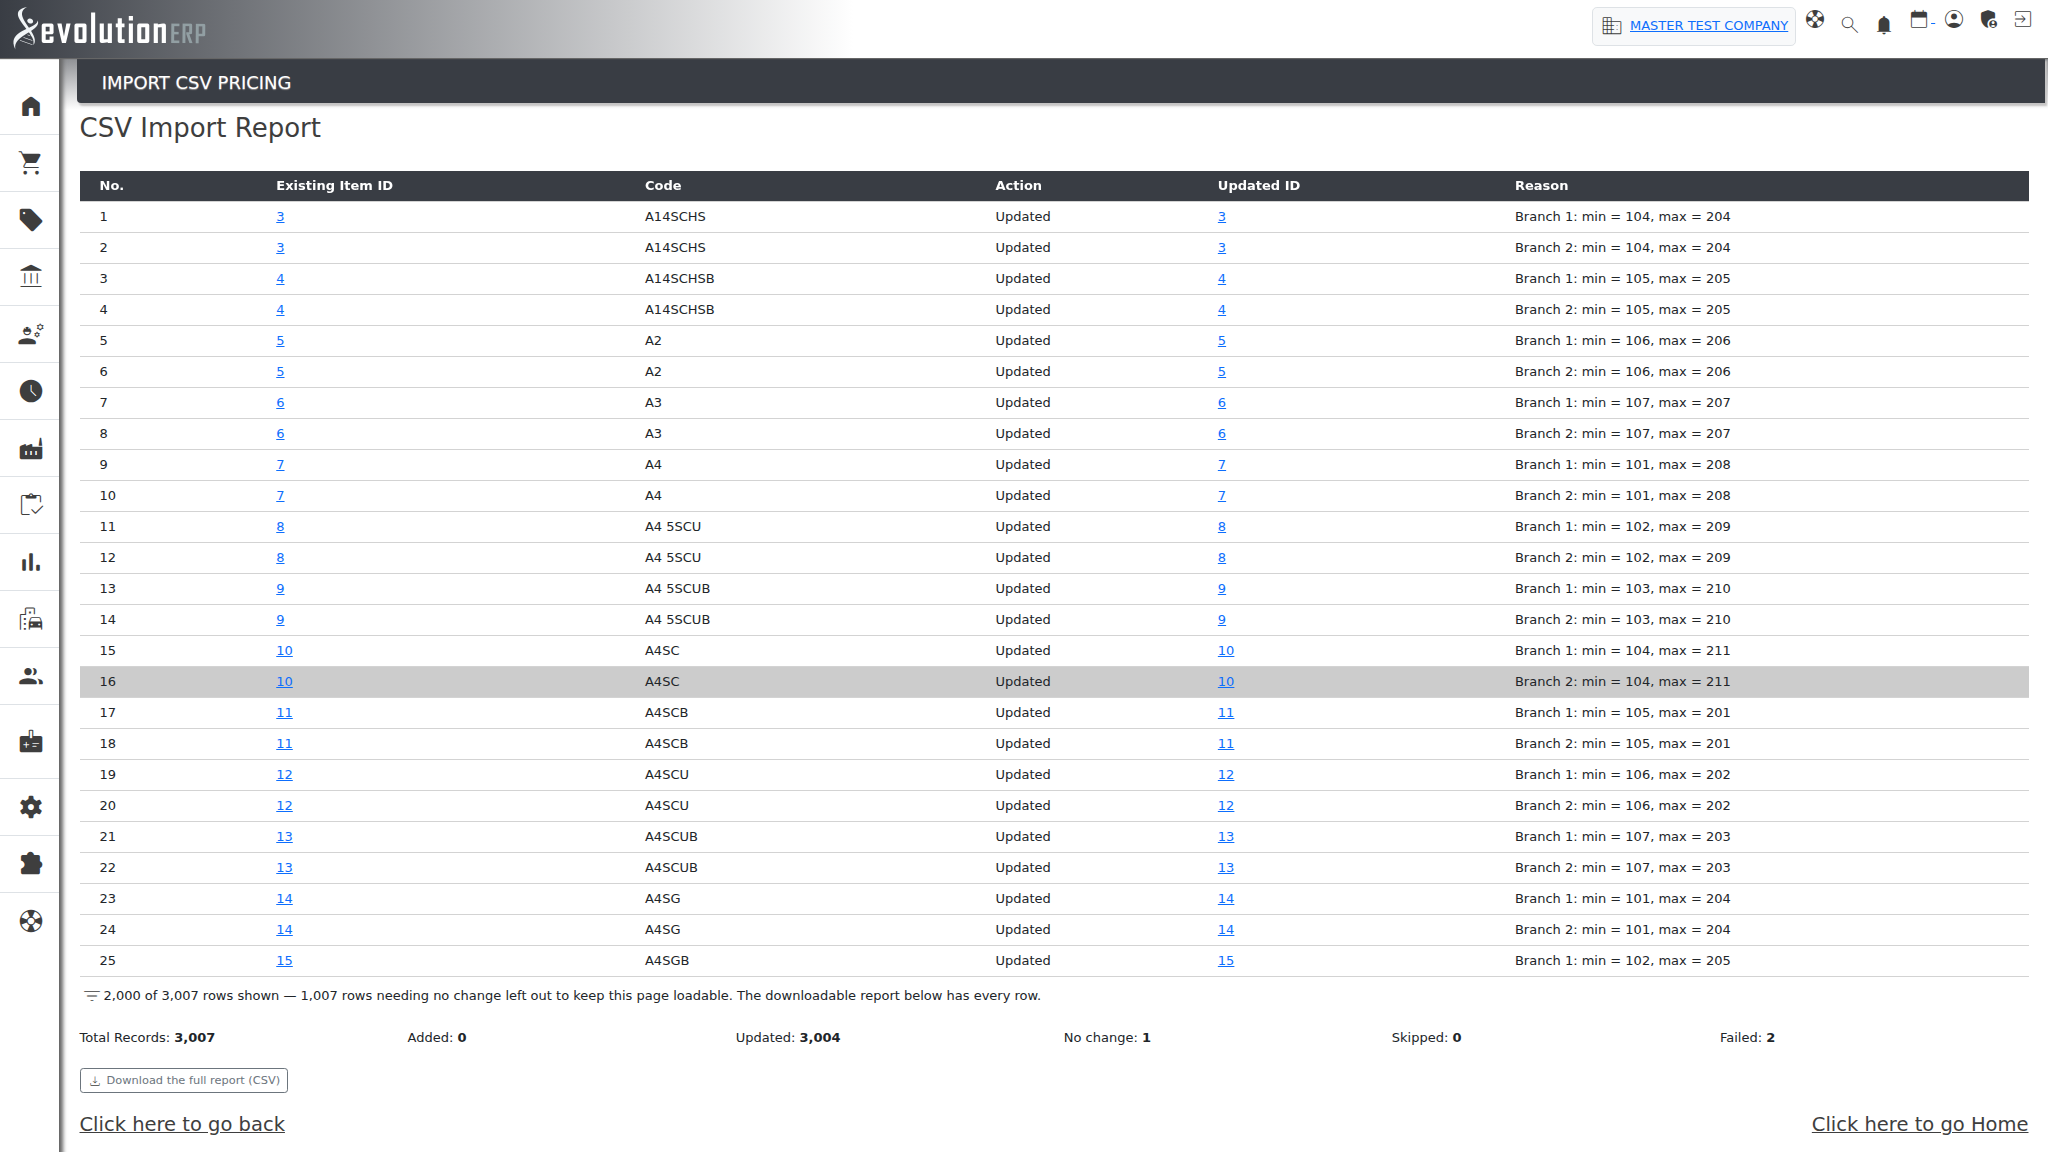
| Result | What it means |
|---|---|
| Added | A new record was created — a new item, or the first branch stock record for that item and branch. |
| Updated | An existing record was changed. The reason column shows what was written. |
| No change | The row matched, but the values in the file were already the values on the record. Nothing was written. |
| Skipped | The row was deliberately passed over — for example a row carrying an Item ID on an Import new items run. |
| Failed | The row could not be applied. The reason column says why: no item matched the code, no branch matched the name, a bin code that does not exist in that branch, and so on. |
Failed rows are not a half-finished import. Every other row still went in. Fix the rows the report lists and re-run just those — rows that are already correct come back as No change, so re-running a whole file is safe.
Fields You Cannot Import
Stock On Hand, Allocated, On Order and Average Cost appear in the exports but cannot be imported.
These are not stored figures you can set — they are calculated from your stock movements, open sales demand and open purchase orders. Writing a number straight into them would be discarded by the next stock movement and would leave no audit trail behind, so the importer deliberately does not offer them.
Backups & Restoring
A snapshot is taken automatically before every import, so you can undo one that went wrong. Snapshots are kept for Inventory, Supplier Codes and Branch Stock, and only when something actually changed.
To roll back, choose Restore from a backup on the first screen, pick the type and the date and time of the snapshot, then review the preview of what will be restored before confirming.